Telegram is a great thing with all its bots, groups, and channels. Let’s learn to post channel messages with an AWS Lambda
For many of us developers, telegram became not only a single point of communication with real people but also with our infrastructure. For example, we at OQTACORE often use telegram bots for alerts and simple configuration commands. In some cases, in the early stages of development, we even use telegram bots to monitor and reboot application servers on the weekends. A simple telegram bot is much easier to use than accessing SSH or an AWS console.
But today we want to describe one of the most classical snippets we use – that is an AWS lambda that sends messages to a given channel. This can be used for the simplest alert mechanism.
Create a new bot
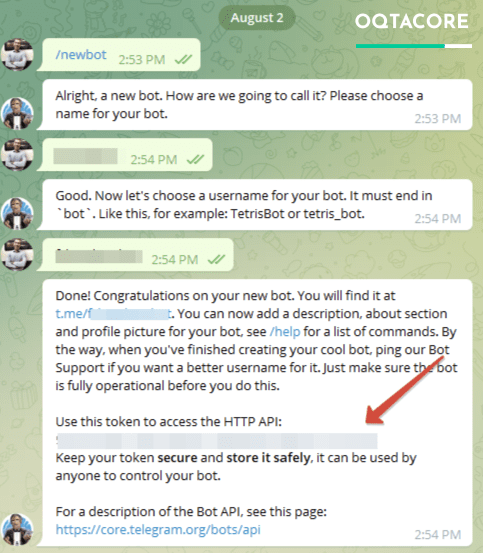
First, you would need a telegram bot. If you haven’t already, open your Telegram client and message to @botfather

After a series of simple commands, you will be granted a token (pointed at by the red arrow).
Add the bot to your alerts channel
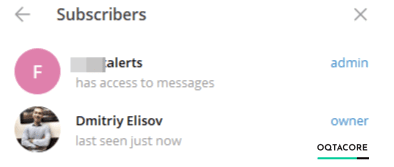
Create a new telegram channel and your bot there. Telegram will let you know that the bot can only be added with admin rights, and it should be fine.
Get the channel ID
Before writing the lambda, you will need to know the channel’s ID. This is not hard. First, write some messages to the channel. Then you can use CURL:
curl 'https://api.telegram.org/bot{token}/getUpdates'
Don’t forget to replace {token} with your bot token that you obtained from @botfather!
You will receive json with all messages from the channel, so let’s say I wrote ‘hey’:
{

  "ok": true,

  "result": [

{

   "update_id": 54351351,

   "channel_post": {

     "message_id": 8,

     "sender_chat": {

       "id": -351351351321,

       "title": "FsBet Alerts",

       "type": "channel"

     },

     "chat": {

       "id": -351351354351,

       "title": "FsBet Alerts",

       "type": "channel"

     },

     "date": 1660047498,

     "text": "hey"

   }

}

  ]

}
From this JSON, you need result.channel_post.chat.id. Just copy it manually, you don’t need to write any code here 🙂
Finally, the AWS lambda
This lambda is written in a such way that it can be immediately used with an API Gateway Proxy. It returns correct HTTP response codes. But you still can use it directly.
const https = require('https');

const chatId = %MY_CHAT_ID%;

const botToken = '%MY_BOT_TOKEN%';

exports.handler = async (event) => {

const response = await sendMessage(JSON.parse(event.body).message);

return response;

};

async function sendMessage(message) {

const response = {

     statusCode: 200,

     headers: {

         'Content-Type': 'application/json',

     }

};

return new Promise((resolve, reject) => {

     const data = JSON.stringify({

         chat_id: chatId,

         text: message,

         parse_mode: 'HTML'

     });

     const options = {

         hostname: 'api.telegram.org',

         port: 443,

         path: `/bot${botToken}/sendMessage`,

         method: 'POST',

         headers: {

             'Content-Type': 'application/json',

             'Content-Length': data.length,

         }

     }

     const req = https.request(options, res => {

         res.on('data', d => {

             response.body = JSON.stringify(data);

             response.statusCode = 200;

             resolve(response);

         });

     });

     req.on('error', error => {

         response.body = JSON.stringify(error)

         response.statusCode = 503;

         reject(error);

     });

     req.write(data);

     req.end();

})

}
To call this lambda, you can use such a test lambda event:
{

  "body": "{\"message\": \"test\"}"

}
Or, if you add this lambda to an API Gateway Proxy, this would be the way to call it:
curl --request POST 'https://mysecretdomain.execute-api.eu-west-2.amazonaws.com/qa/telegram-bot/send-alert' \

--header 'Content-Type: application/json' \

--data-raw '{

  "message": "test"

}'
Conclusion
That’s it! Now you have a AWS lambda that you can call internally via AWS SDK or externally via API Gateway to send alerts to your telegram channel. We start most of our projects with this lambda, as setting up alerts is essential to ensure that everything works correctly… Especially on the weekends! 🙂
