AWS Amplify is an amazing tool for publishing next.js websites when you are starting a new project.
However, if you continue growing your web portal, there will be a moment when Amplify will fail building due to final build size being to big.
You can postpone this moment by optimizing your node_modules and win 3-6 months, but the ending is inevitable – you will have to move you project to either EKS or Beanstalk.
We prefer Beanstalk for our own reasons – Docker+k8s seems to be an extra abstraction on top of AWS’s abstraction. Kubernetes makes a cloud from your on-premise data center, but AWS is a cloud by itself already. Beanstalk is basically a managed Kubernetes, so why make life harder? Code Pipeline and Beanstalk provide a great way to control the deployed build versions, as well as other great tools in terms of monitoring, alerts and costs management.
So, here is a step-by-step instruction for deploying a monorepository on next.js@12.0.7 on elastic beanstalk and assembly on AWS Code Pipeline
Project information
- Next.js version 12.0.7
- Node.js 16.18.1
- Yarn 1.22.9
- NPM 8.19.2
- Monorepository
- Environment for running commands:cli.sh
- The volume of the final assembly is 700mb
Creating elastic beanstalk
- Select the region we need in which we will deploy our application
- Go to the pageelastic beanstalk in the applications tab
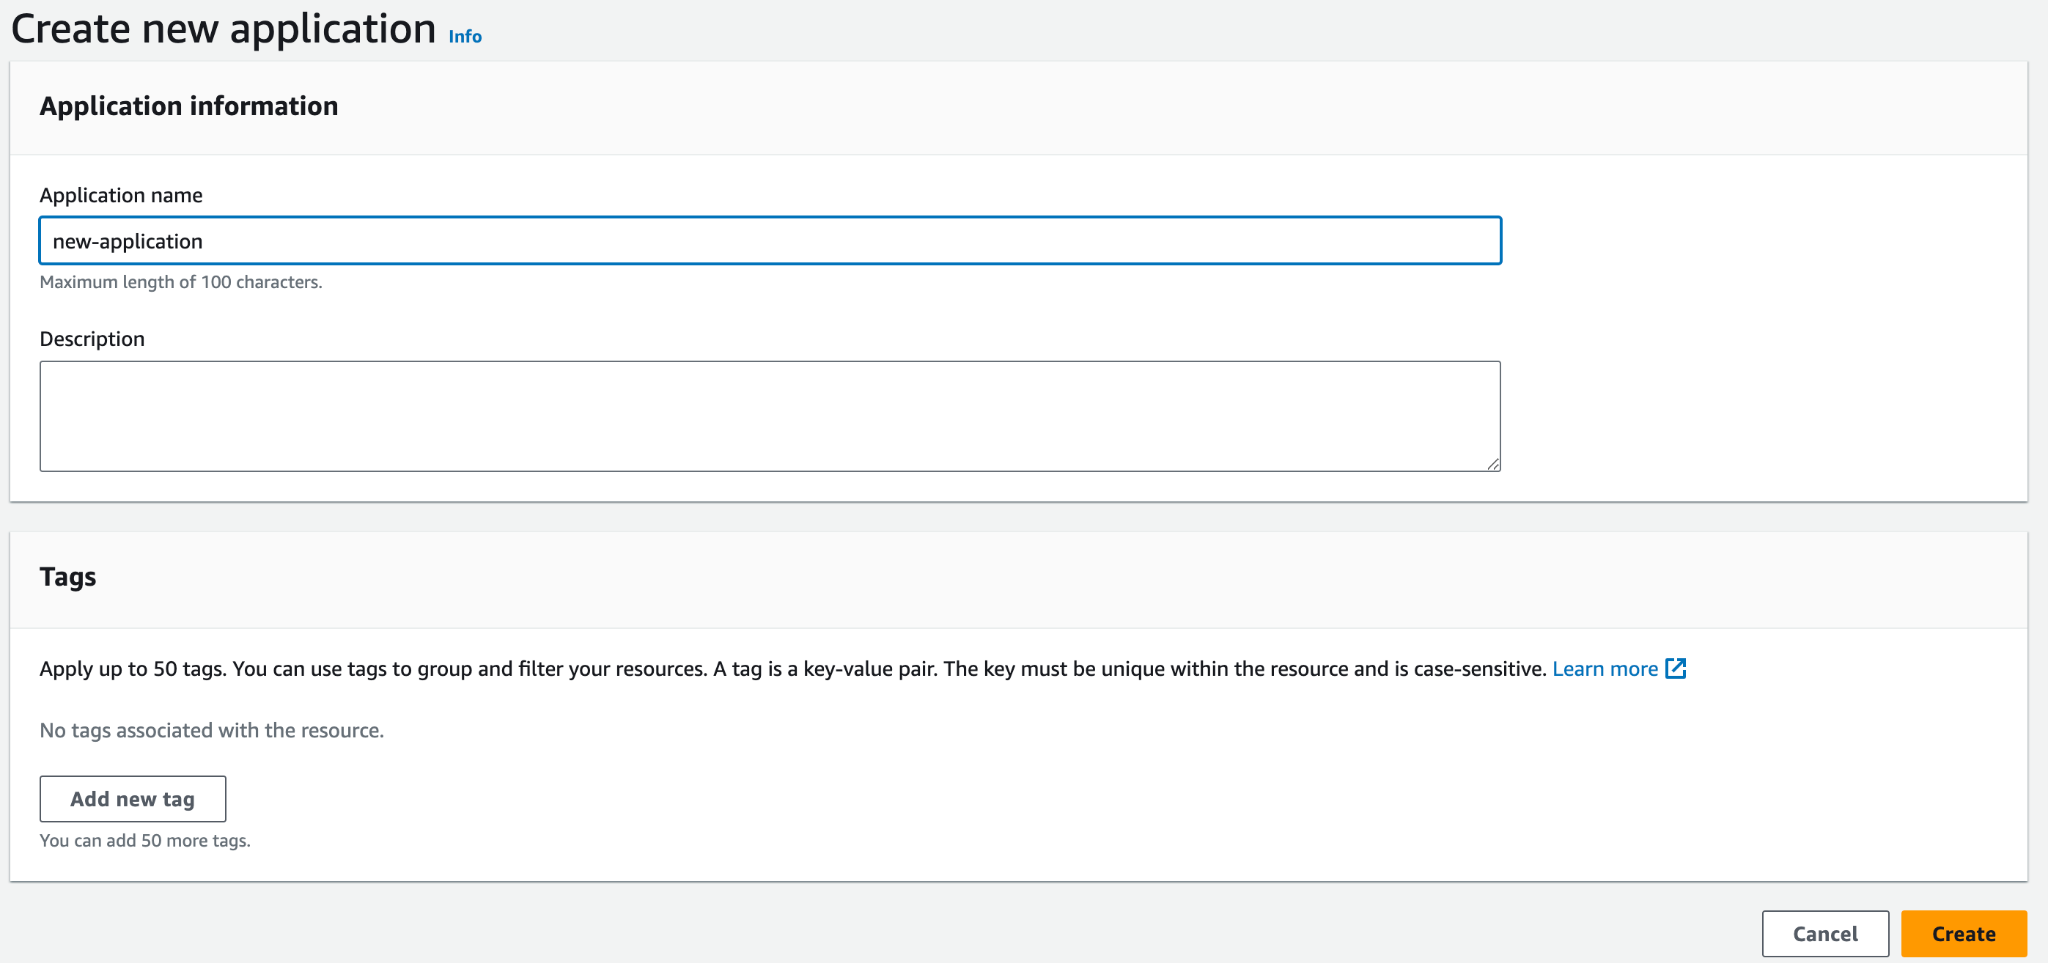
- If necessary, create a new application by clicking on the Create application button

- Enter a name and click the Create button
- When you click on the application name, go to the tabEnvironments.
- Click the Create new environment button

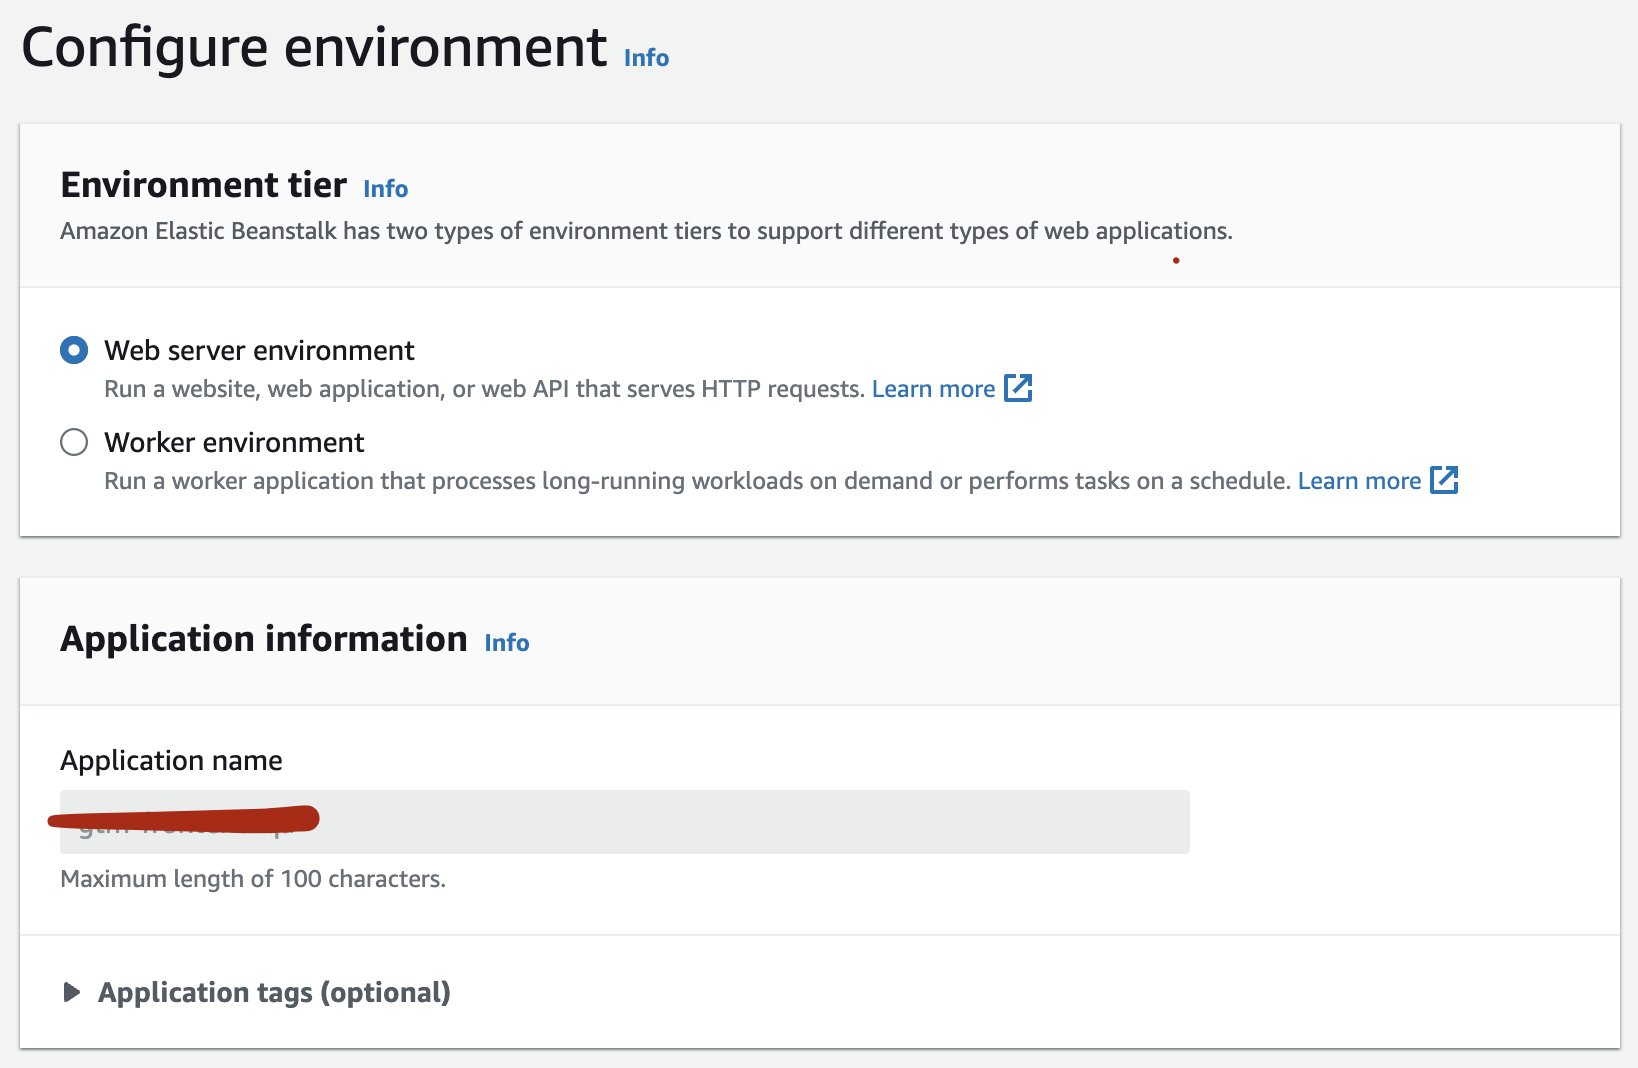
- We put down the configuration as in the screenshot
- Application name will be selected automatically if you clicked on the name in the applications tab
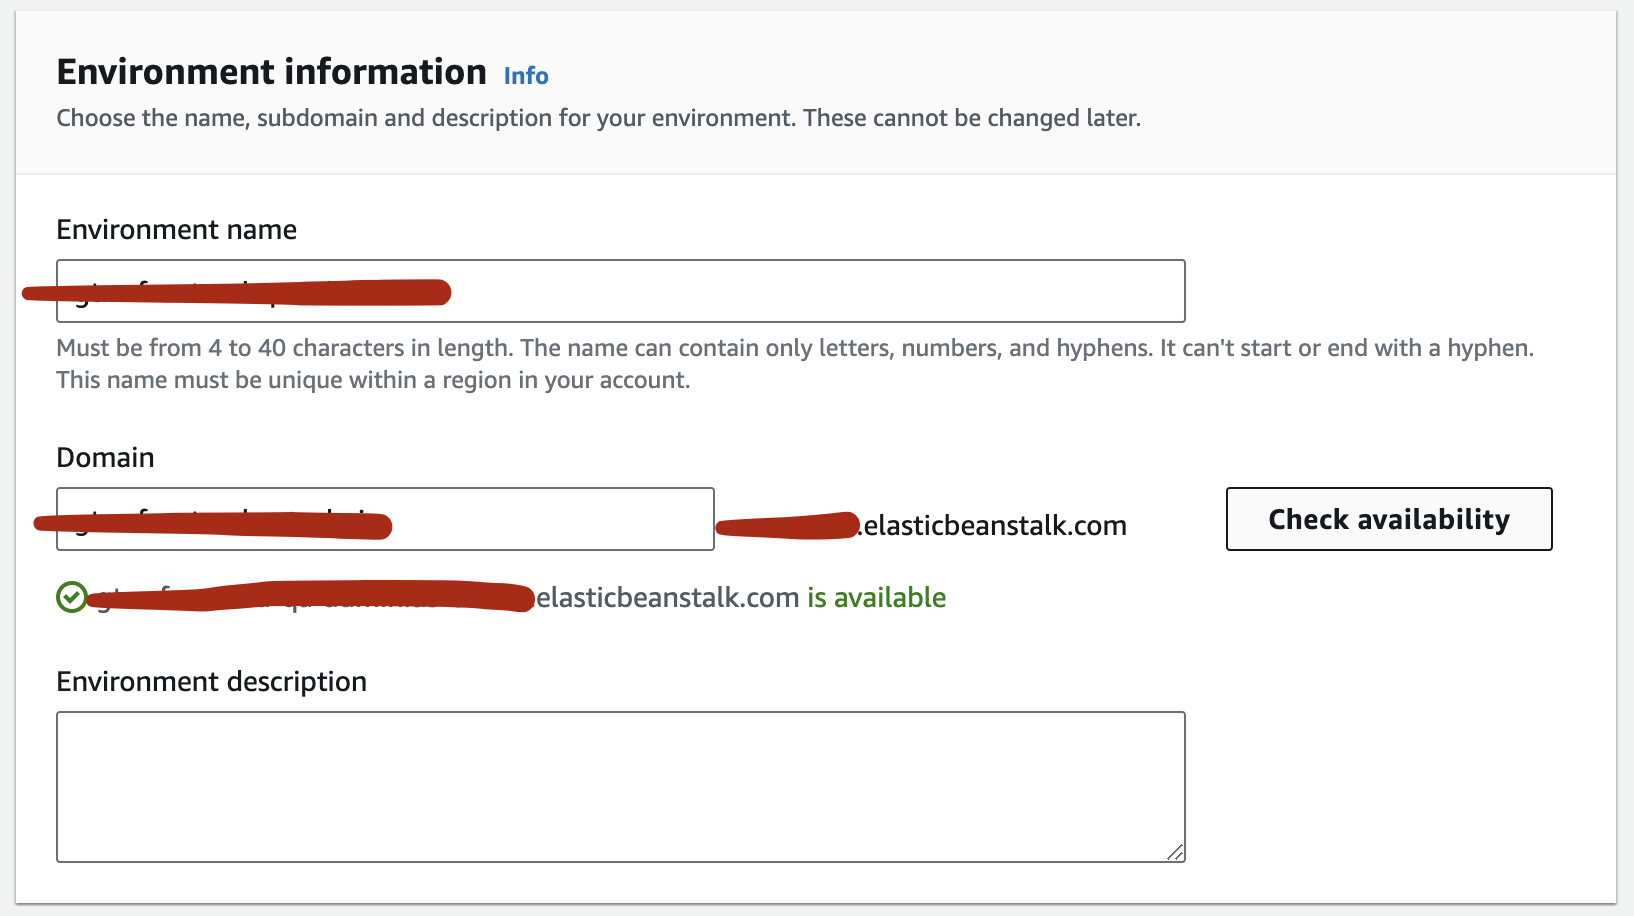
- Enter yourEnvironment name. Enter your temporary Domain name and check its availability using the Check availability button
- For version next.js@12.0.7, you must install version Node.js 16 (this must be observed when creating any environments for version next.js@12.0.7)
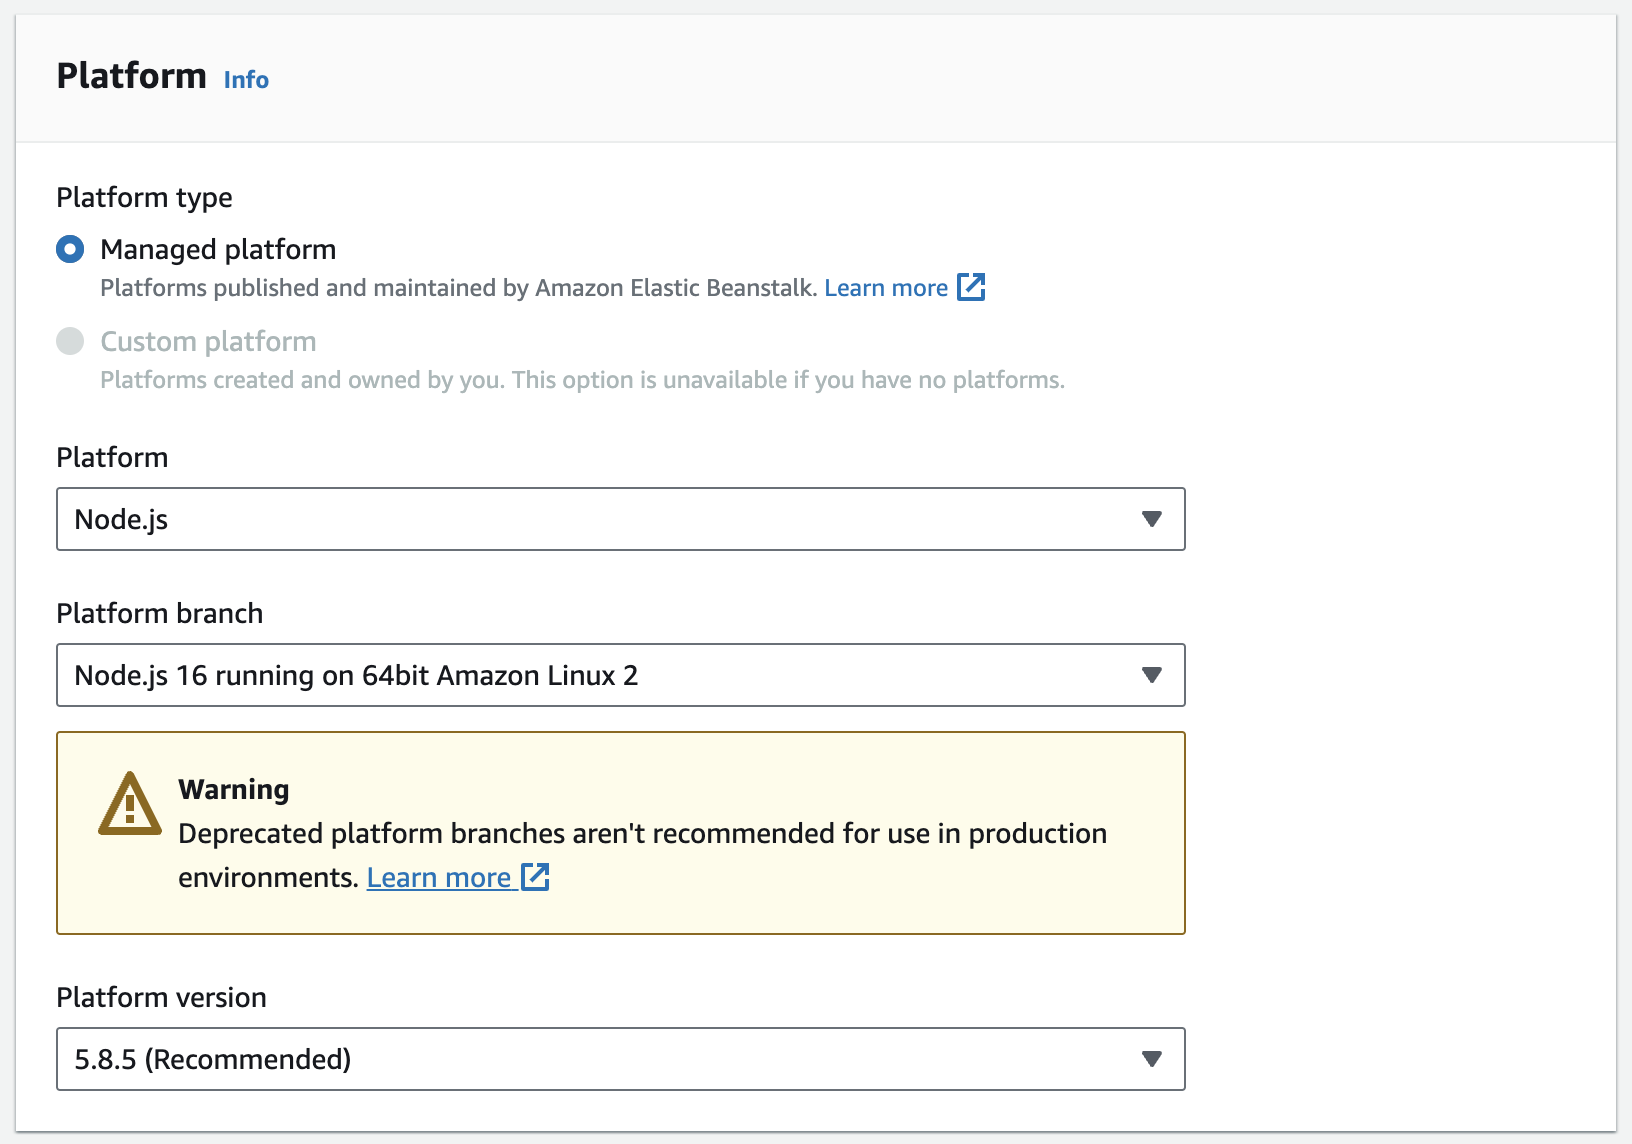
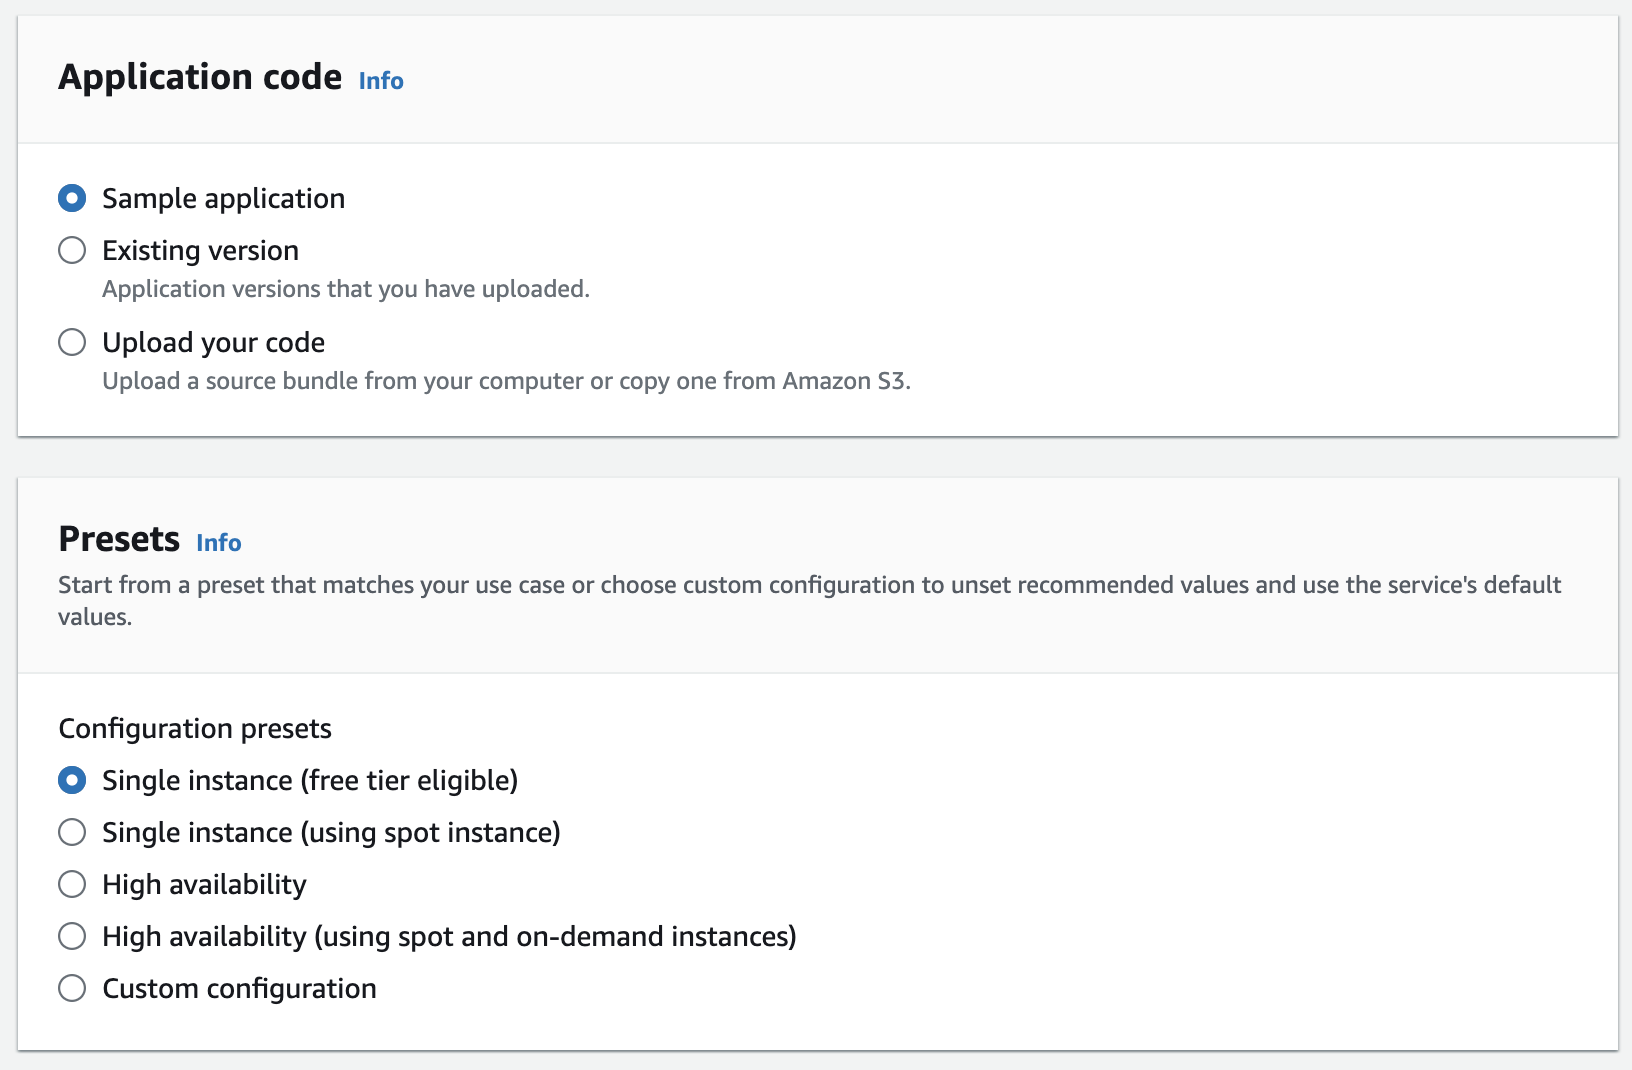
- Next, leave the checkboxes as in the screenshot and move on to the next step by clicking on the Next button
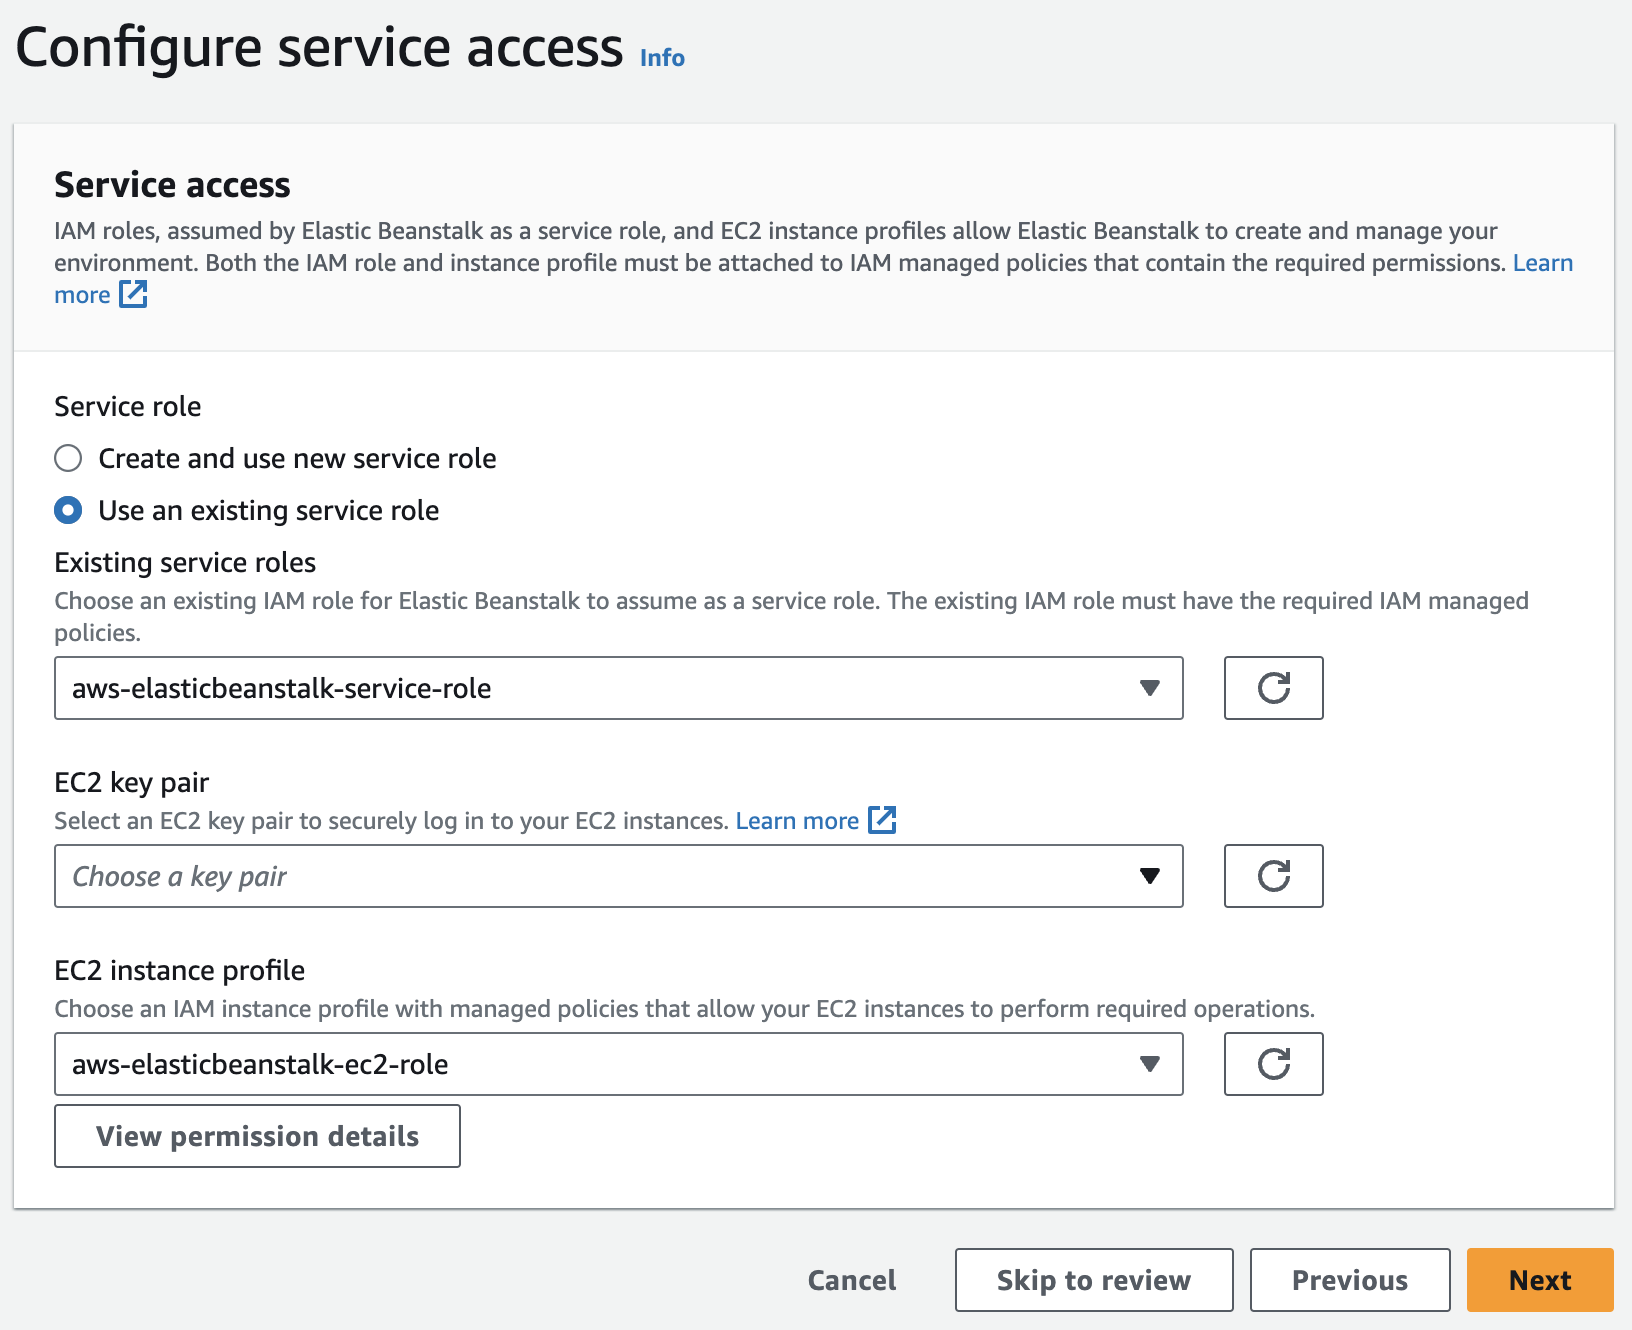
- Next, in the screenshot, select the roles that beanstalk offers us (as in the screenshot below). We do not change them, as the application will launch with an error. If you are creating these roles for the first time, you must refer to the AWS service role instructions.
- Next, click the Next button and move on to the next step.
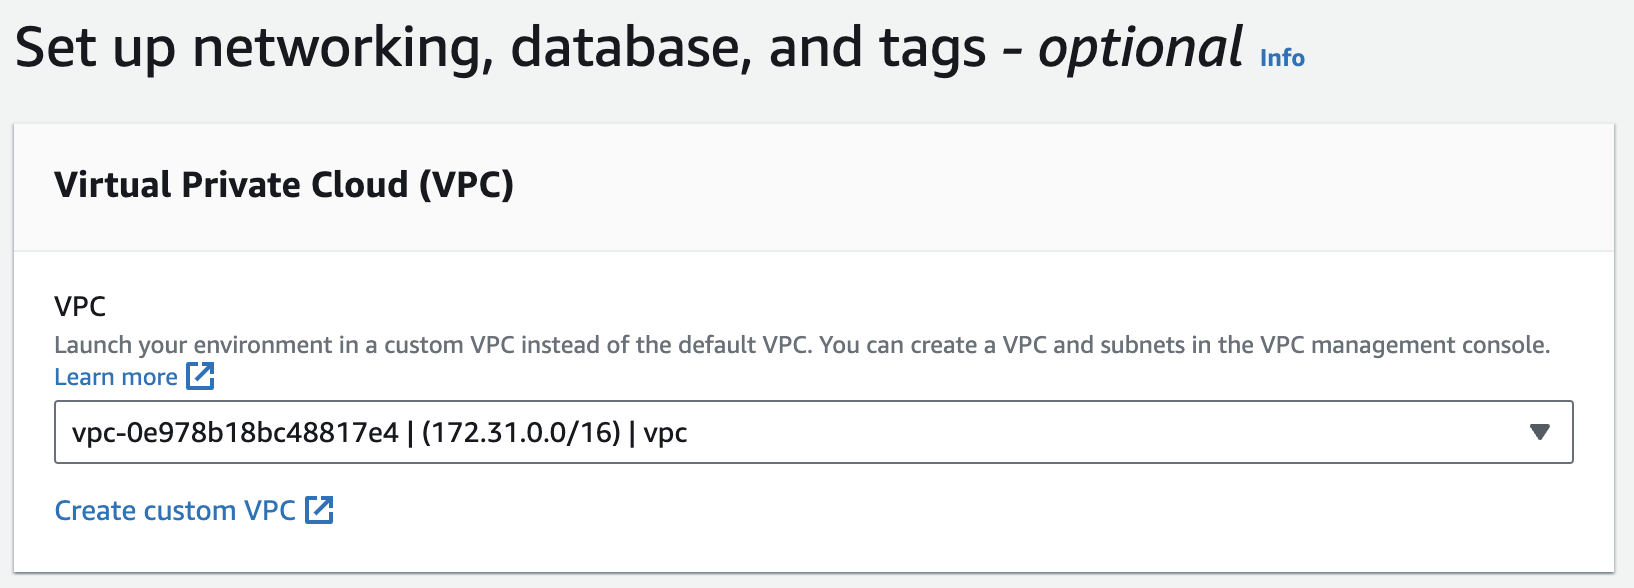
- Next, select the configured VPC. If your VPC does not already exist, you need to create a new one by clicking on the Create custom VPC button and refer to the AWS VPC documentation
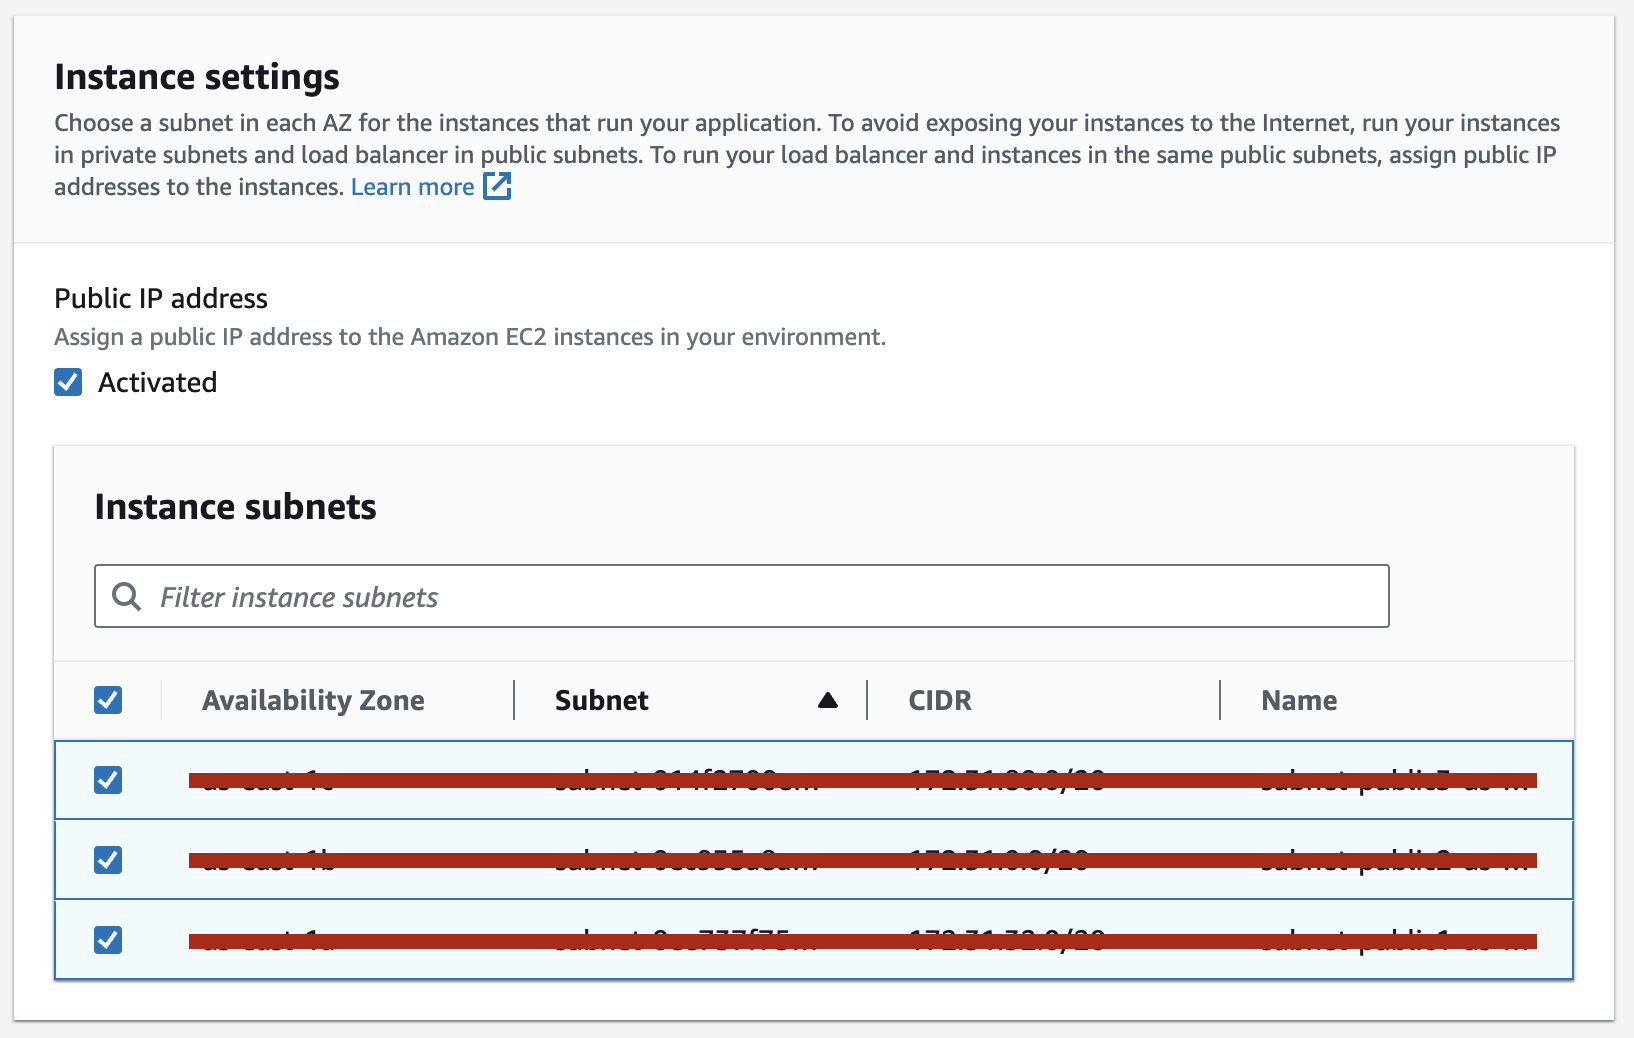
- Select the Activated option for the Public IP address. We also select all available regions
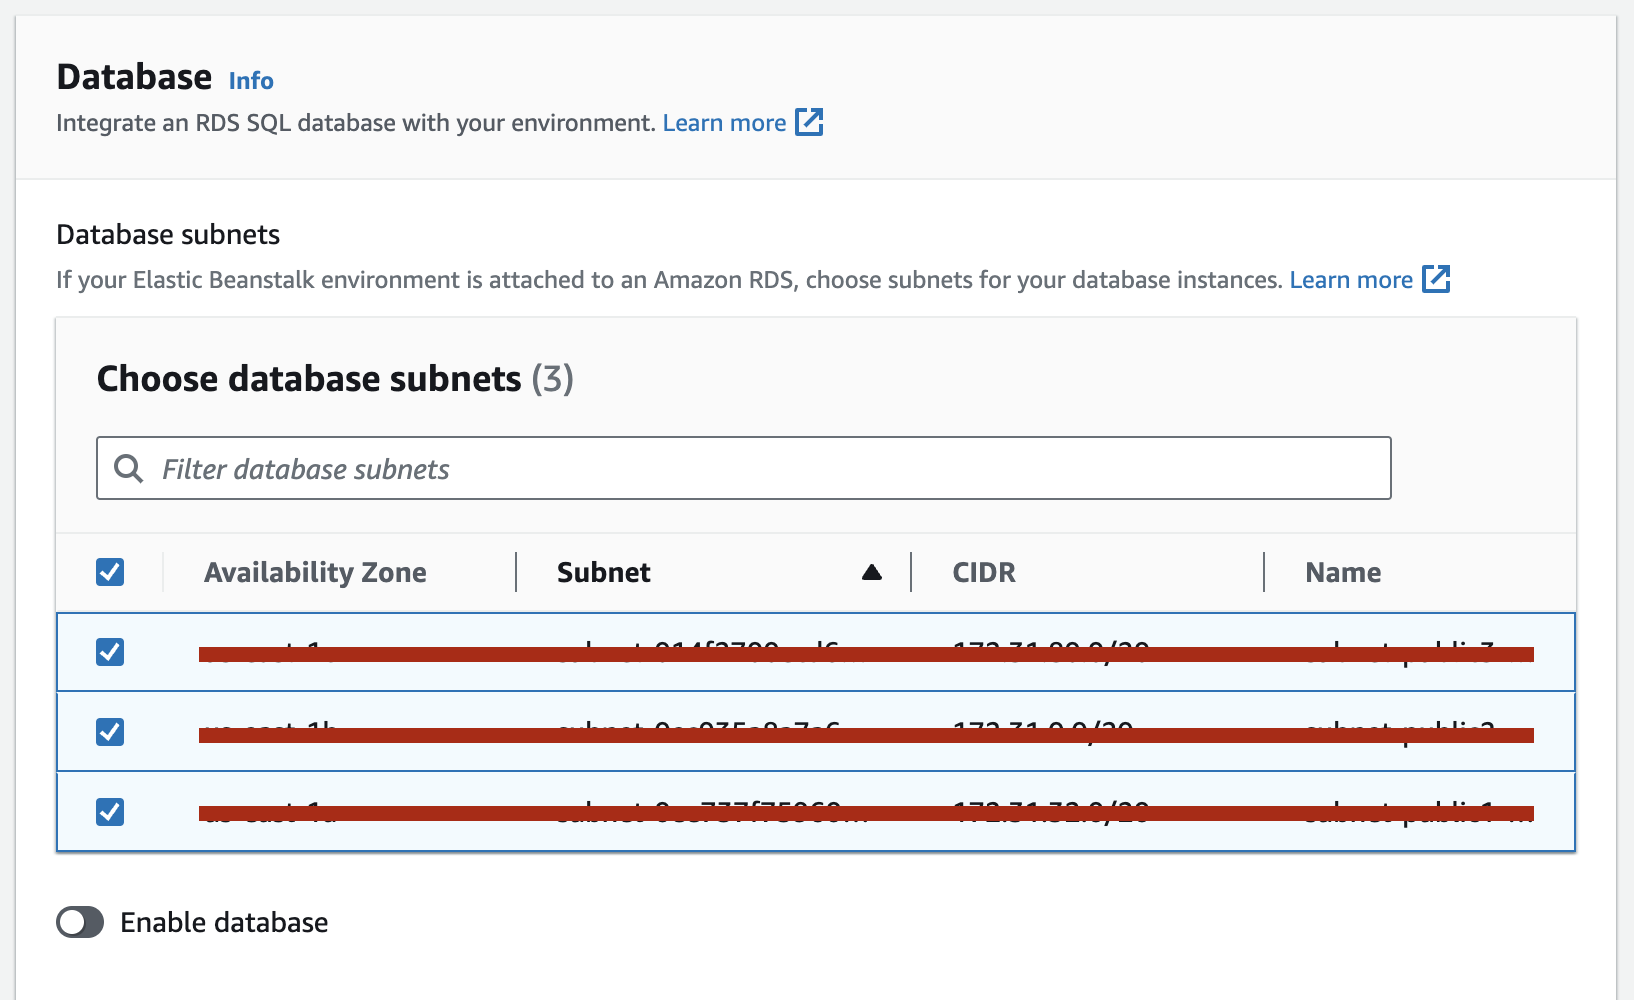
- Select all available regions for the database. We leave the remaining options in the Database section unchanged.
- Next, click the Next button to move to the next stage
- Depending on the volume of the finished assembly of your project, select the SSD used. In this example, we use a monorepository, the volume of the final assembly is ~700mb (excluding node_modules)
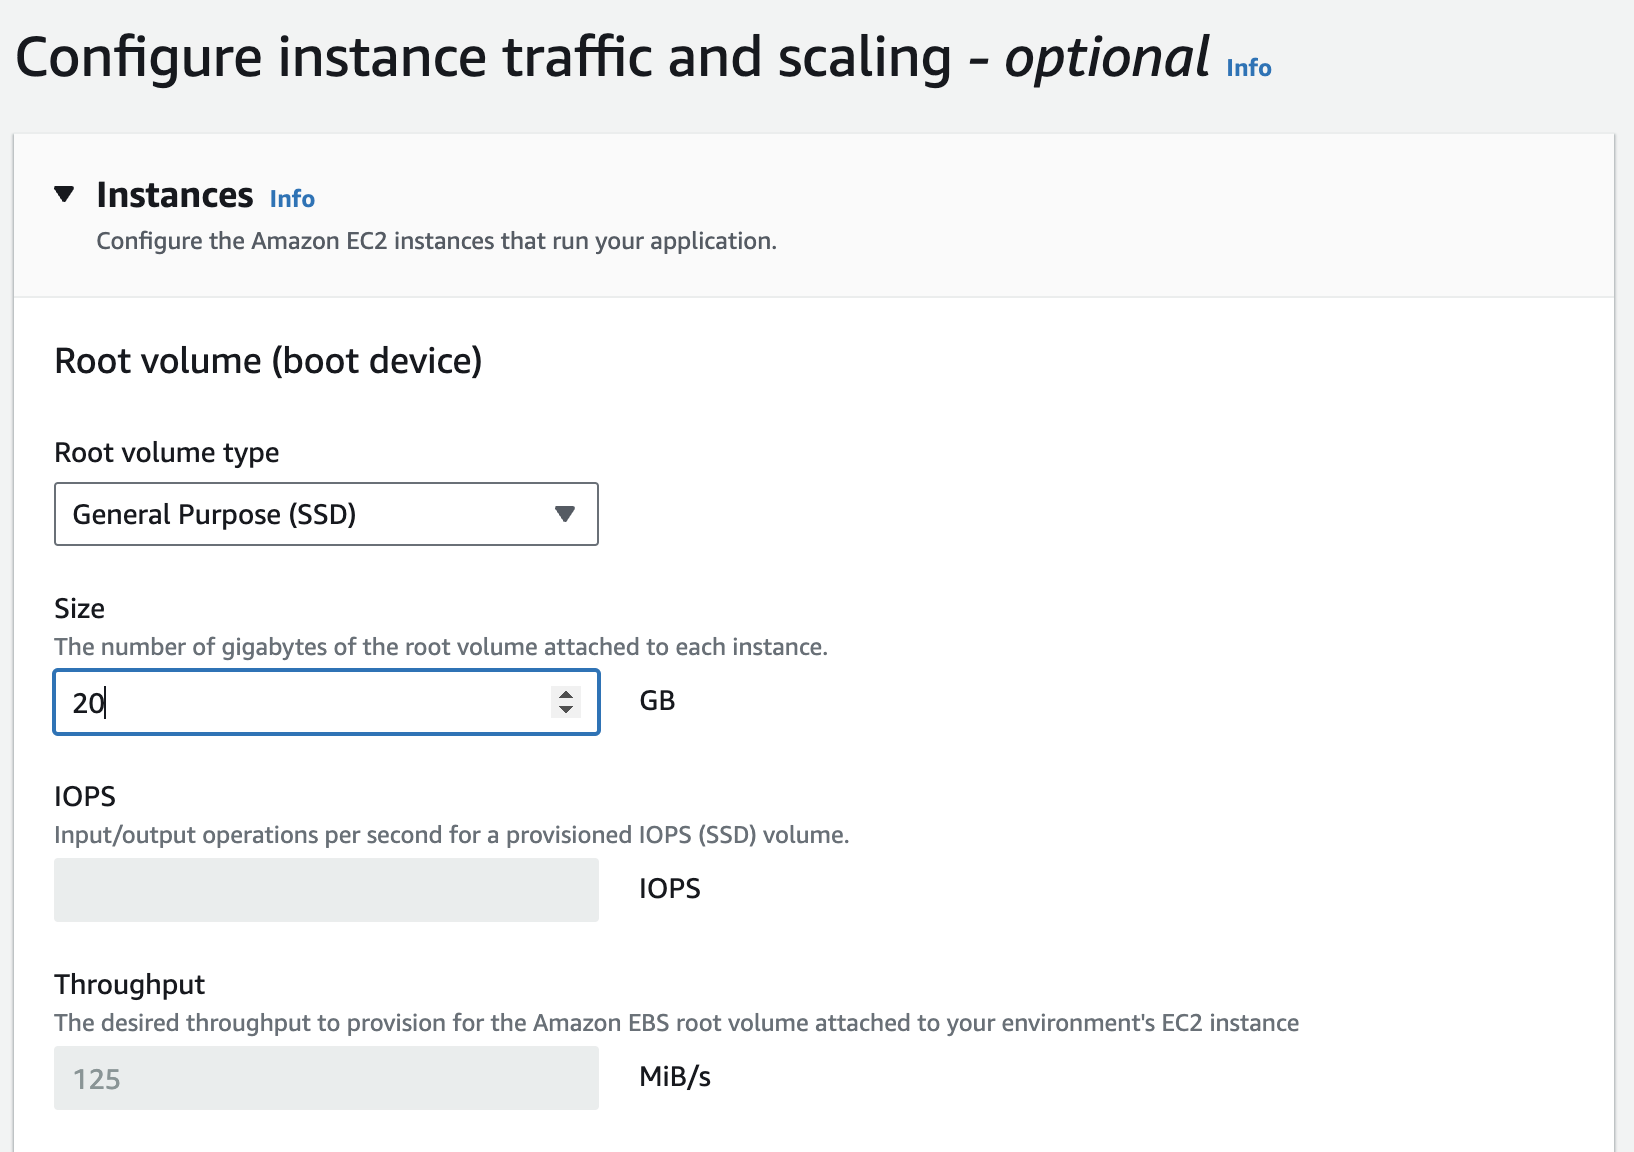
- Leave the rest of the options as they are.
- Next, select the pre-configured EC2 security group. If this is your first time creating a beanstalk, please refer to the AWS documentation on creating an ec2 security group

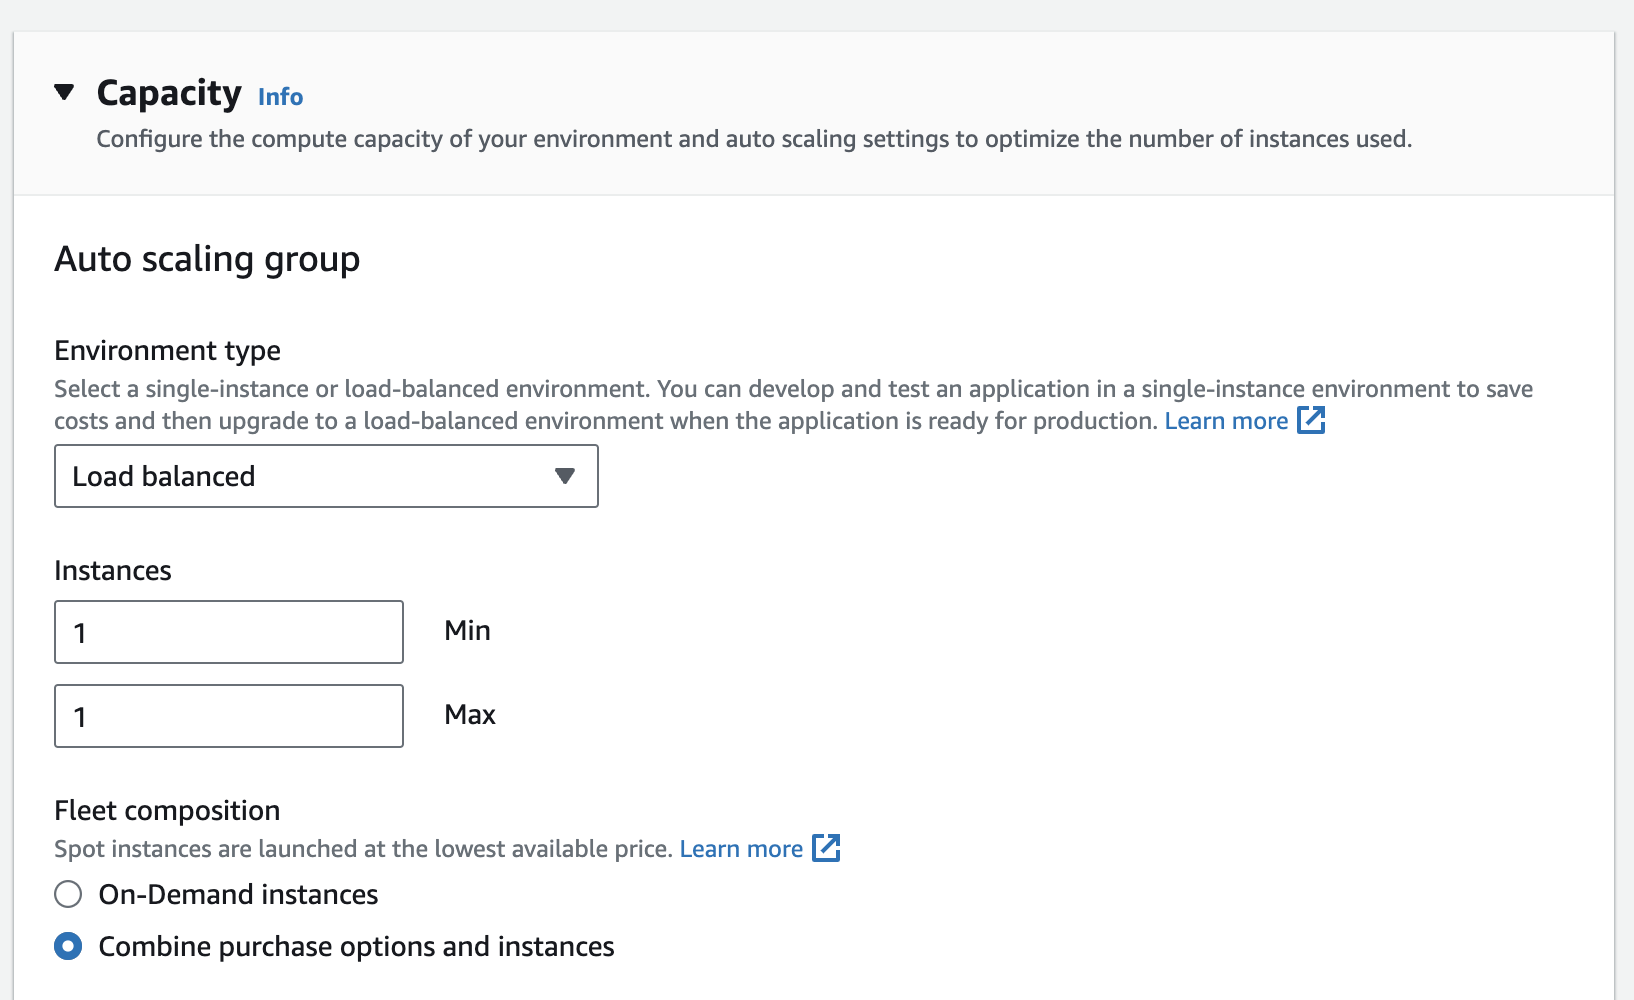
- Next, from the Environment type drop-down list, select Load Balanced and the Combine purchase options and instances option
- Leave the remaining options unchanged
- We choose x86_64 architecture. ANDselect the instance type from the requirements of our project. For a testing/development bench we will need 2 CPUs and 4gb of memory. You can also customize your instance to your needs and select it in the AMD ID, but to do this, refer to the AWS AMD ID documentation.
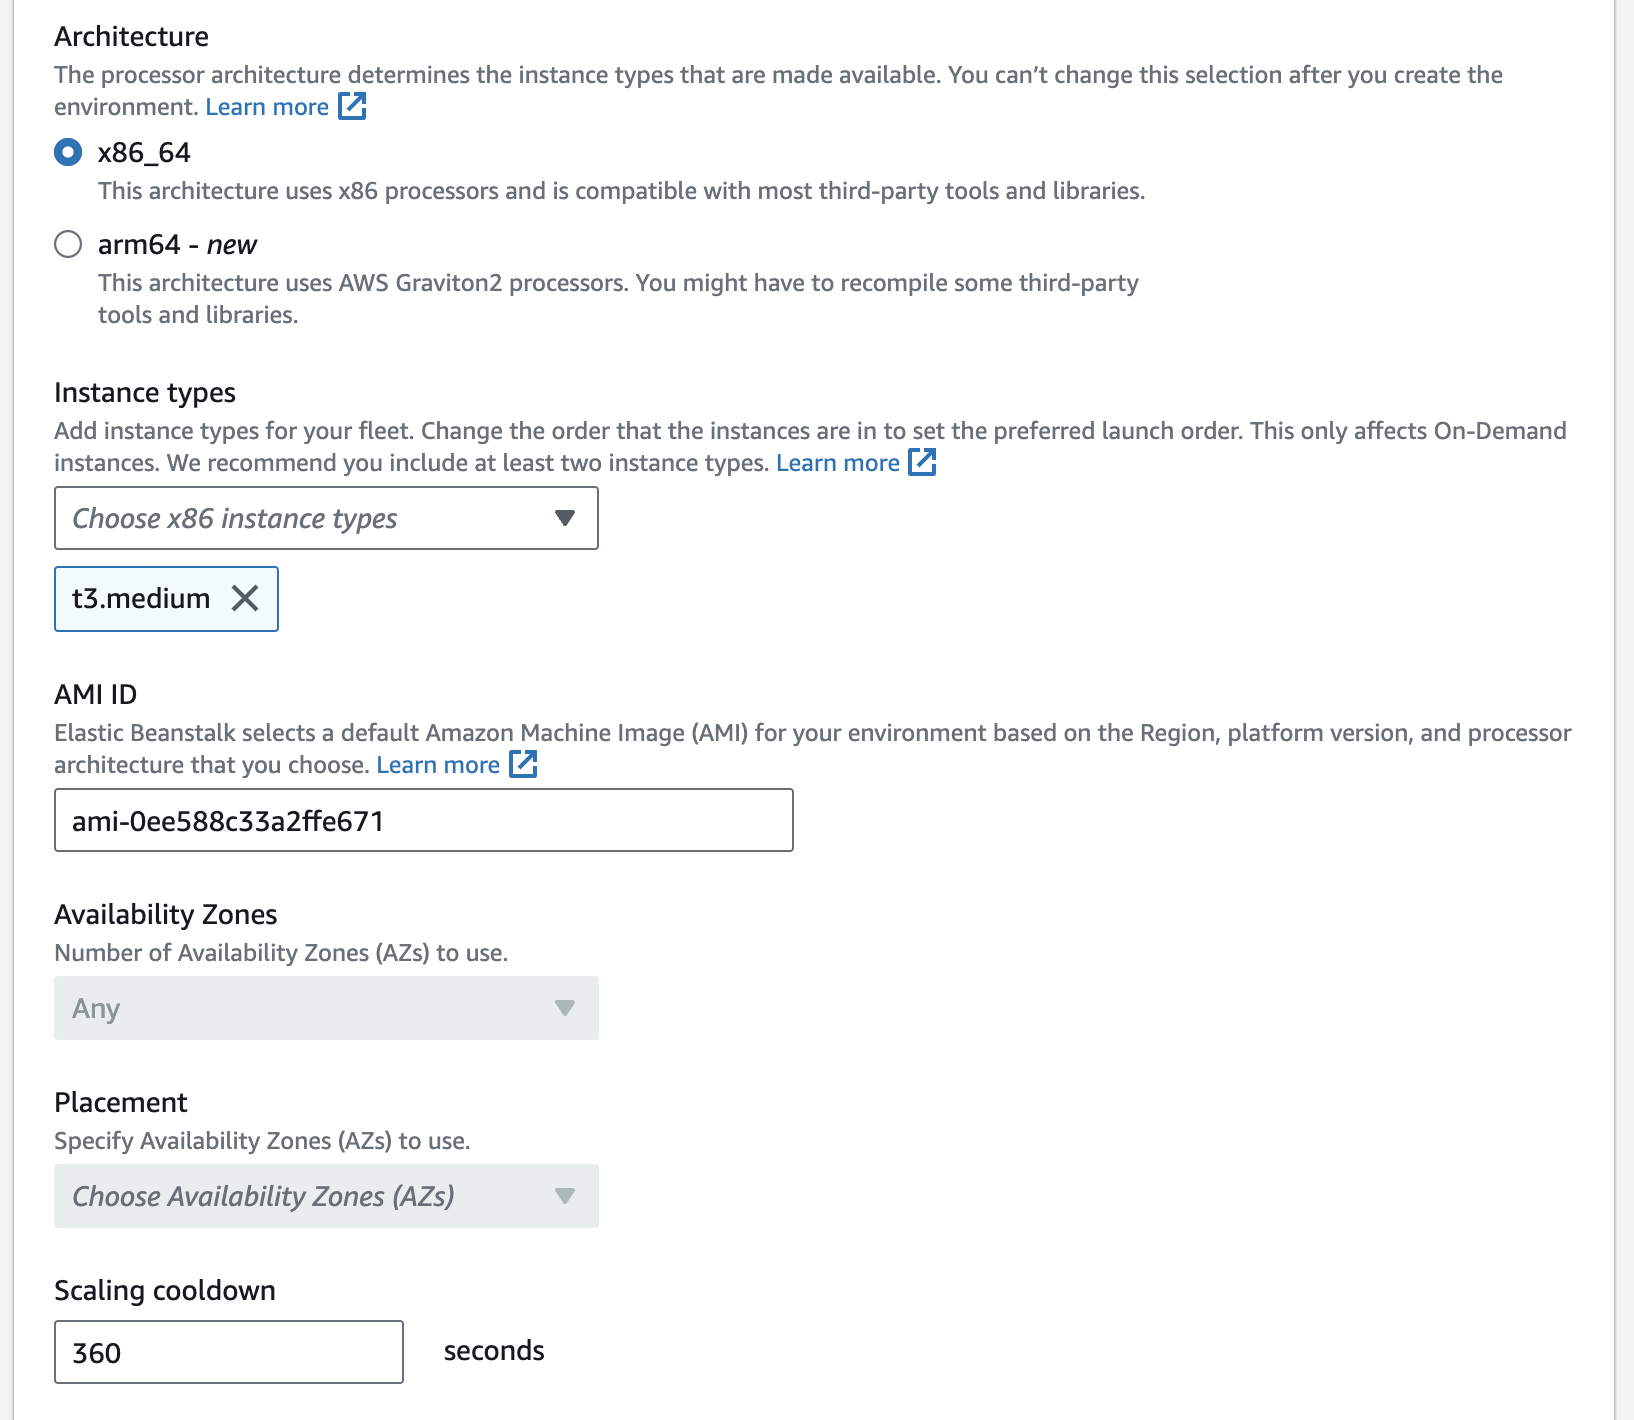
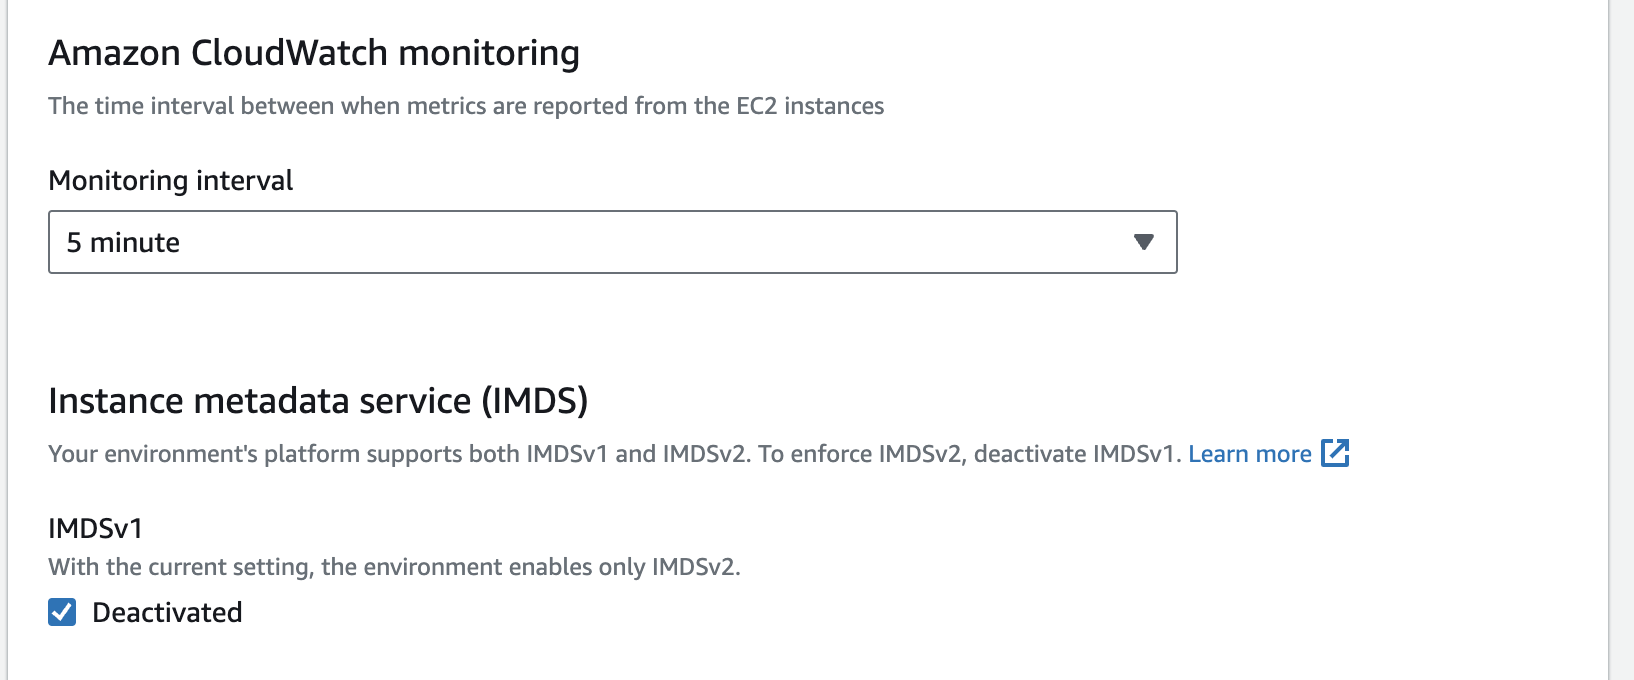
- We leave the remaining options unchanged.
- Next, select all available regions
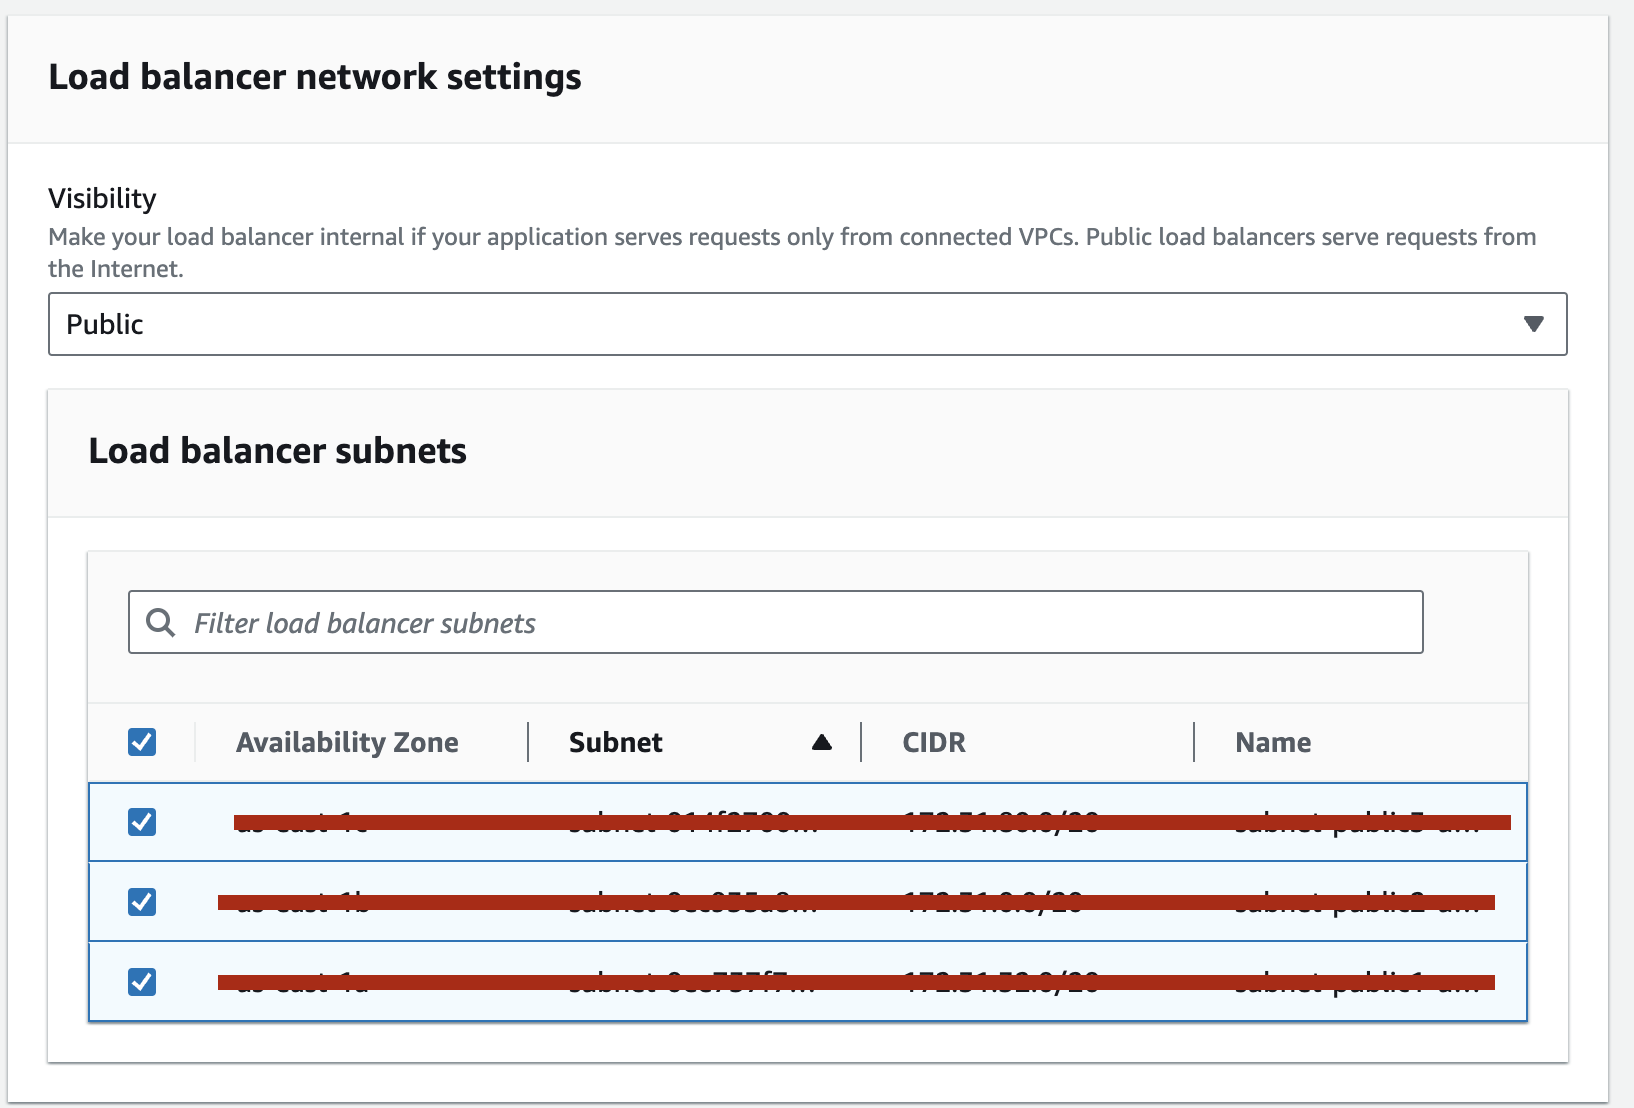
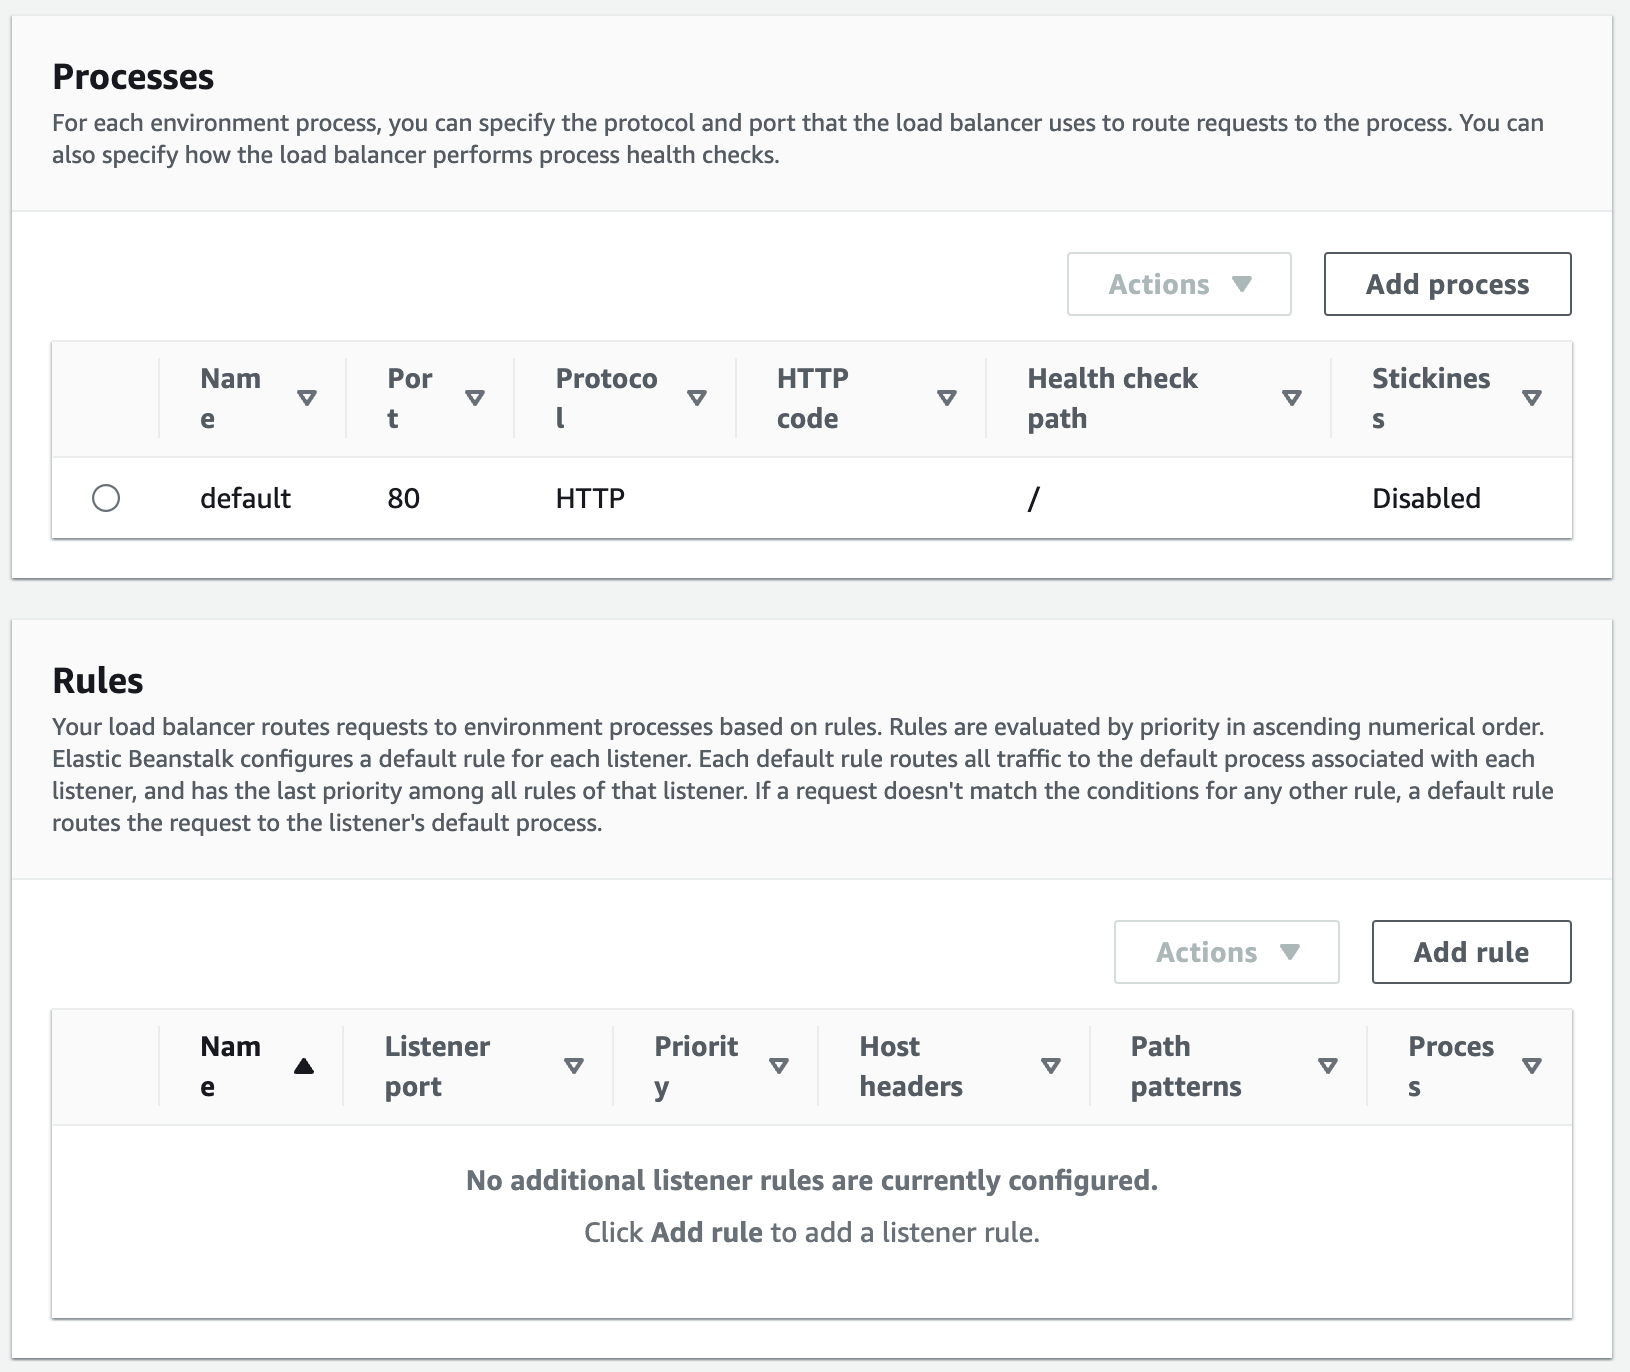
- Next, select everything as in the screenshot, and we will return to the listeneres stage at the very end of our instructions
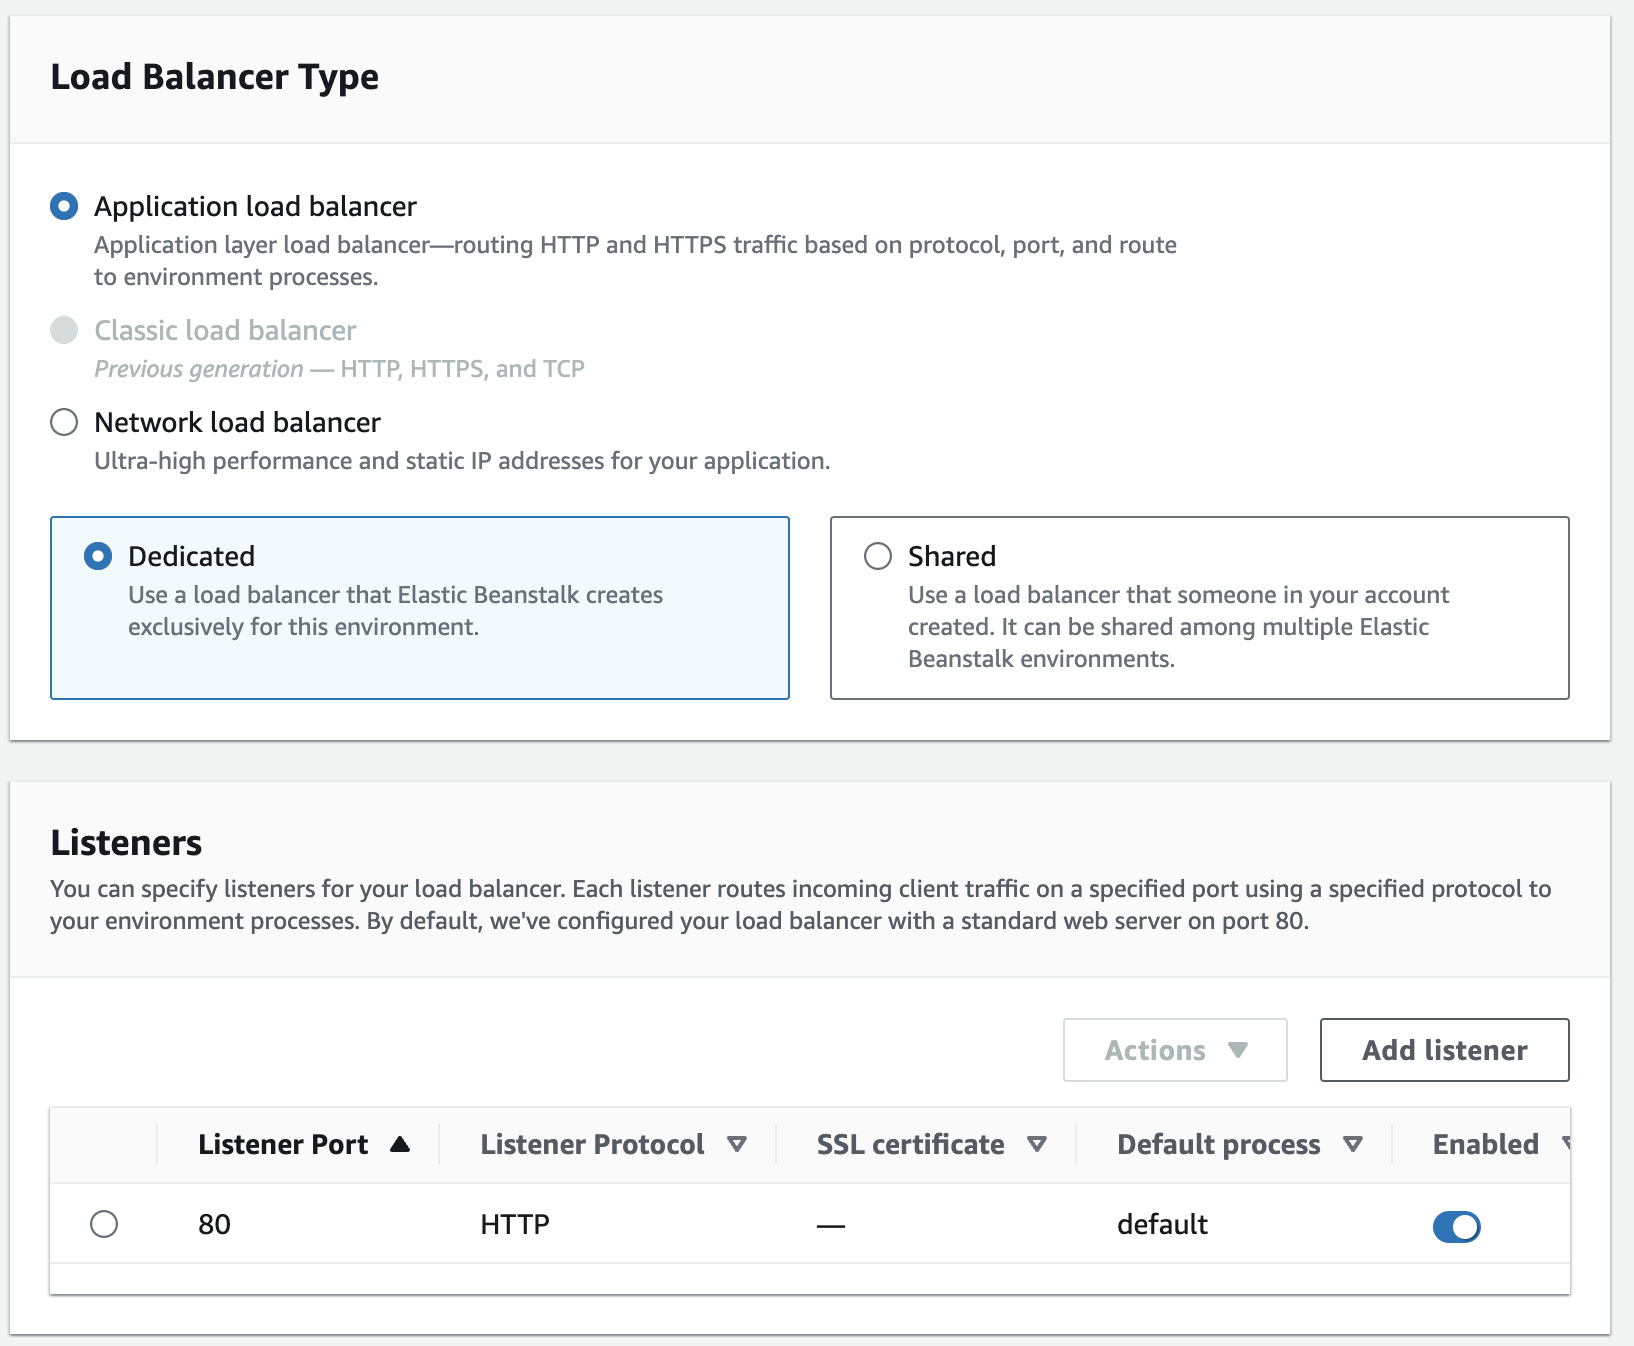
- If we want to use a different port when listening to an application, we add it by clicking on the Add process button. Within the framework of this instruction, we will not consider this stage, since by default Beanstalk looks for the command in package.jsonnpm start (more details here) and runs it on its default port 8080. This port can be changed by creating a global variable PORT at the last stage of beanstalk configuration. You can check the working port:
- Go to the ec2 instance tab
- Find the name by our Environment name
- Click the Connect button at the top
- Login to an instance from the selected 4 connection options (depending on the instance type created, only one login may be available)
- Using the command line, we view the application launch ports used
- Leave the remaining options unchanged and click Next.
- We do not consider the following steps for setting up beanstalk within the framework of this instruction because they remain unchanged. At this point you can just add a global PORT variable to configure your application
Creating codePipeline part 1/2
- Go to the creation pagepipeline. And click the Create Pipeline button

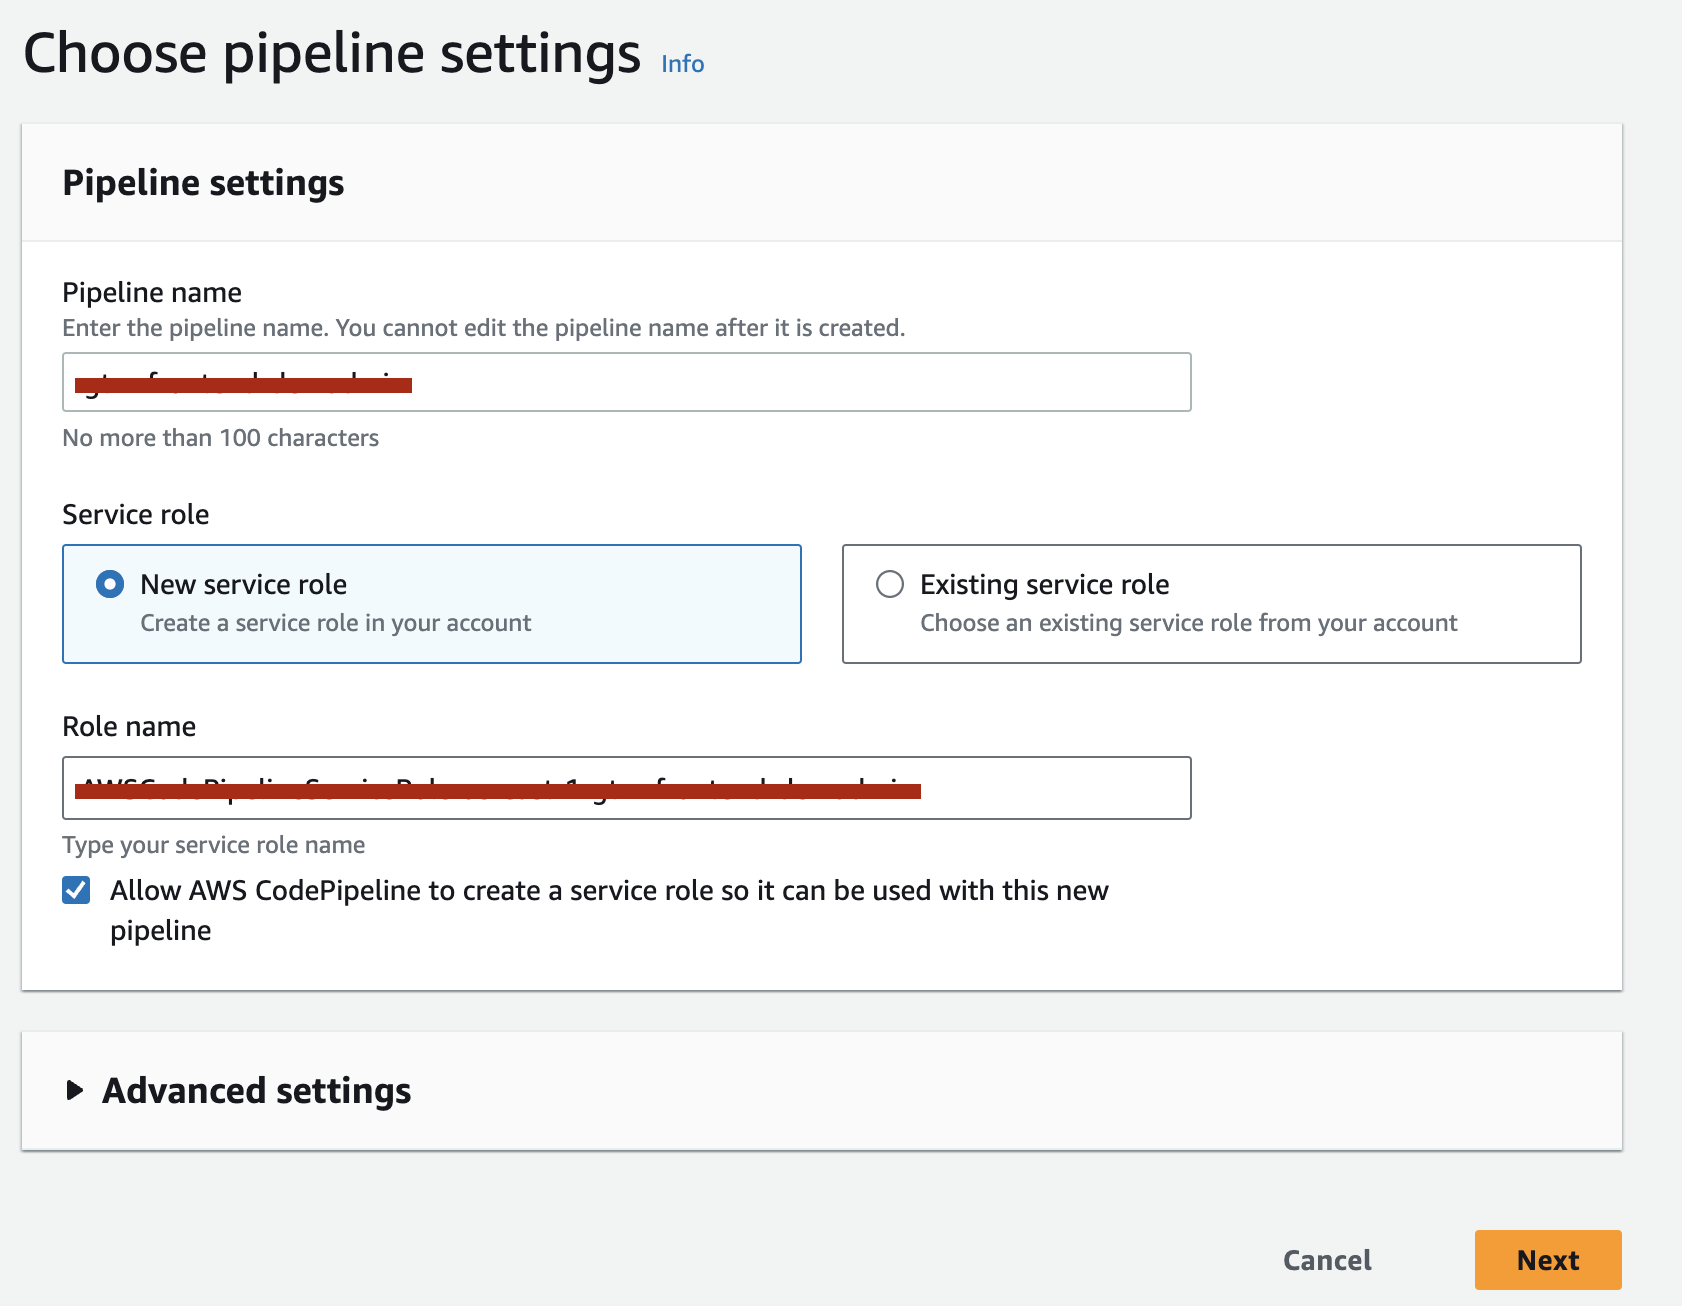
- Enter the name of your new pipeline. Service role should be created automatically. Next, click Next
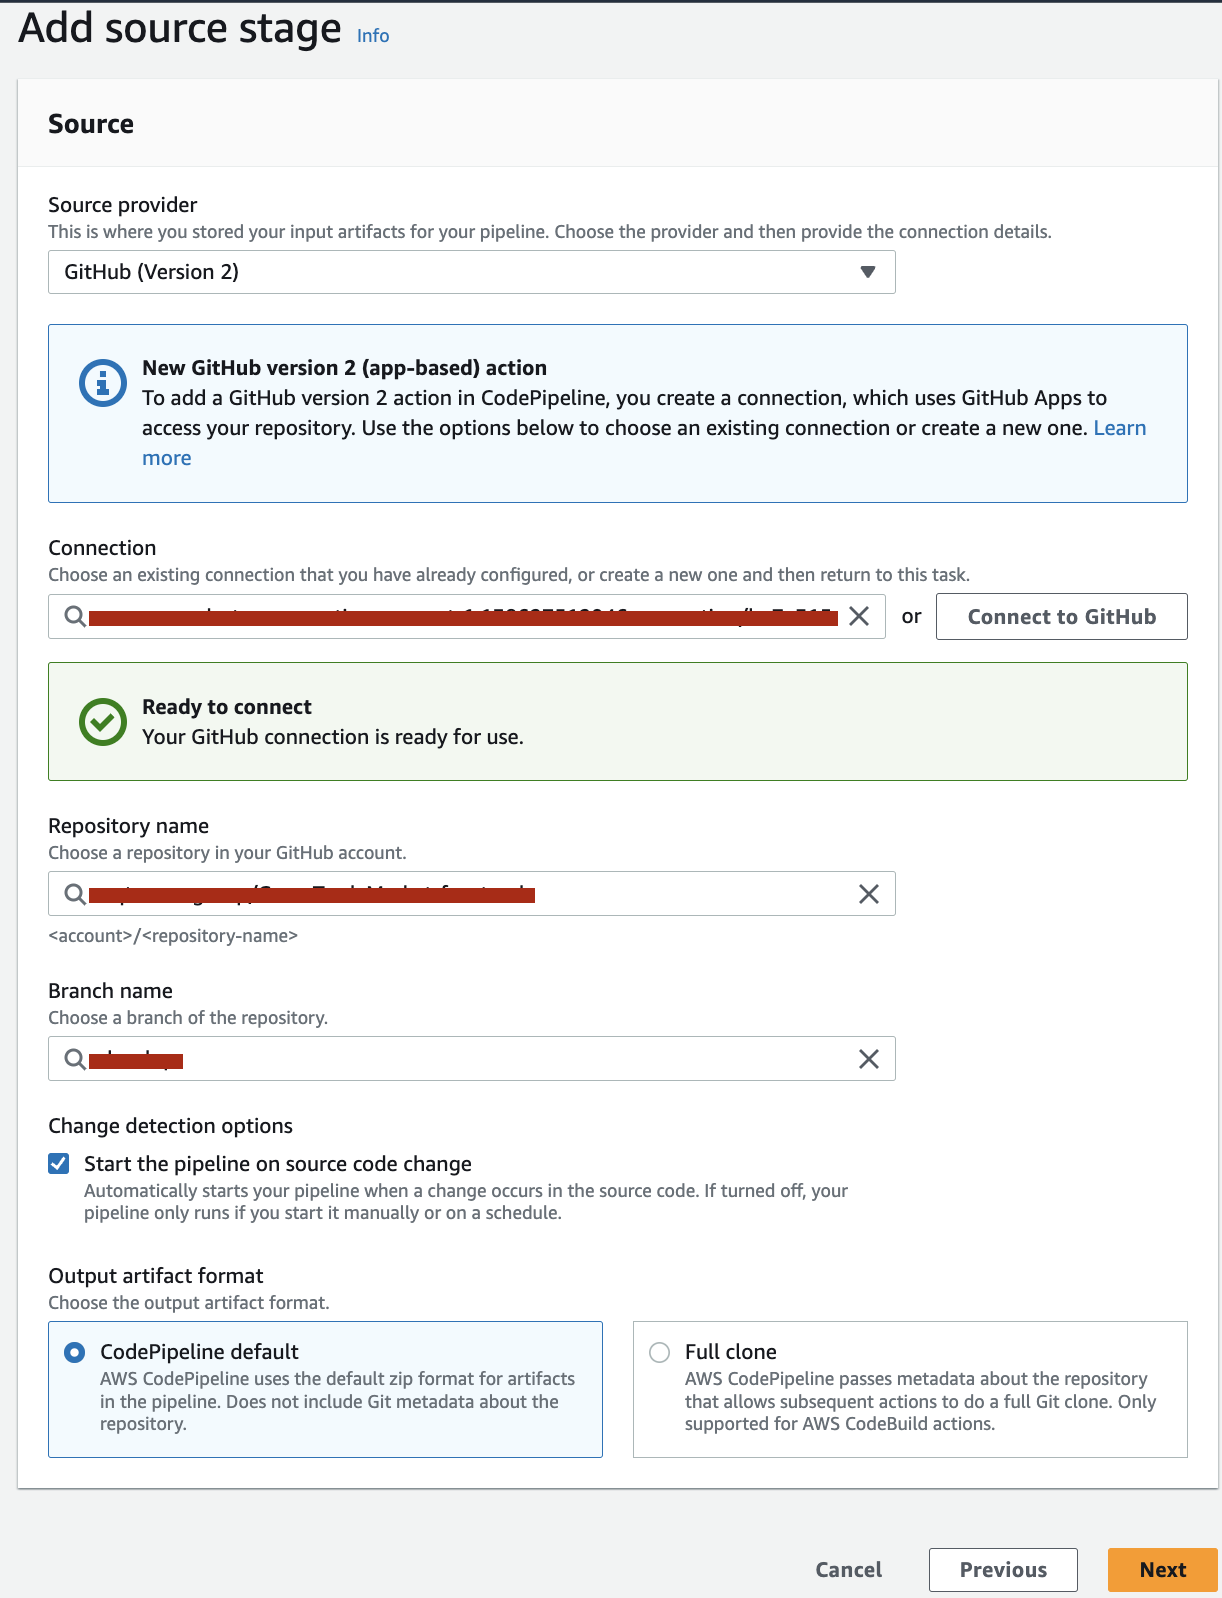
- Next, select Github (Version 2) from the drop-down list. We select a pre-created Connection Github from the list that has access to the GitHub repository of our project. Next, select the names and branch. If you have not created a Connection, please refer to the AWS Connection GitHub documentation. Next, click Next.
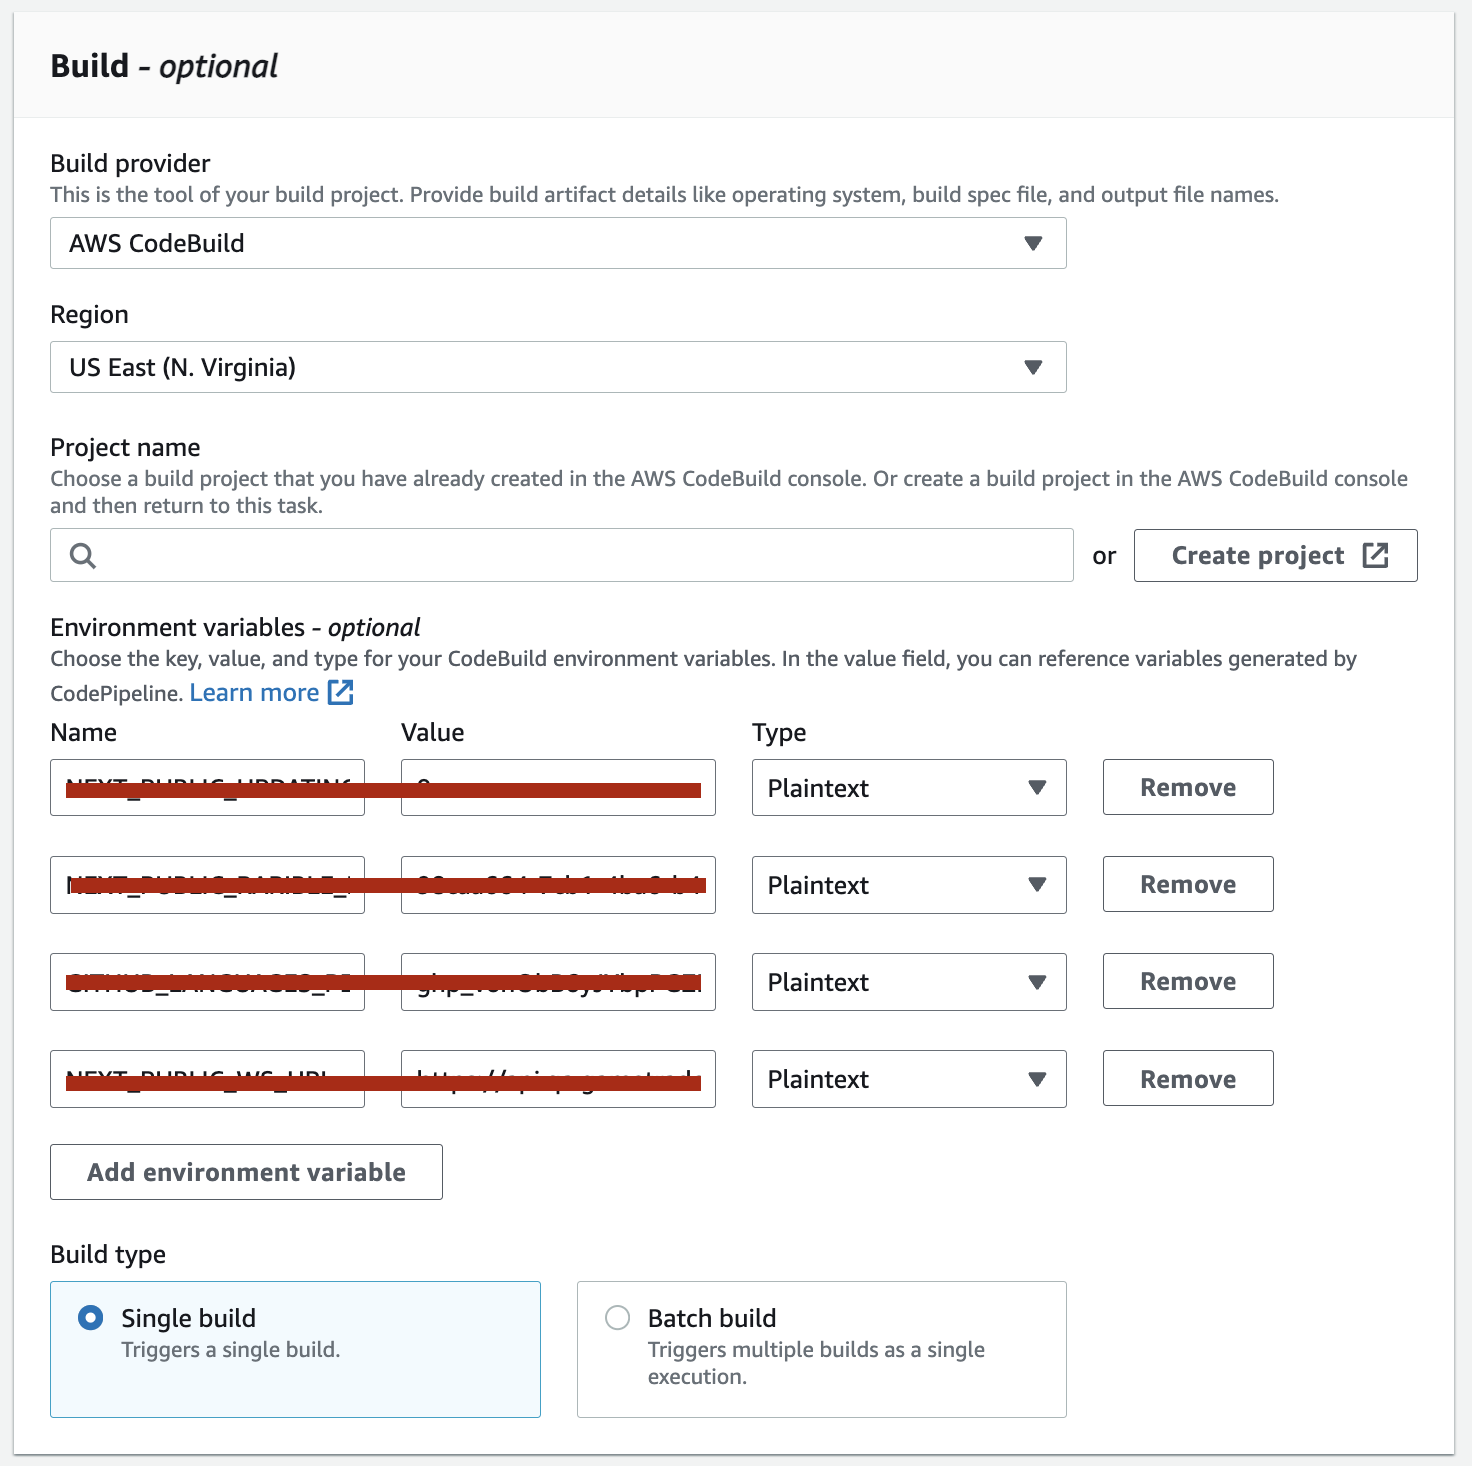
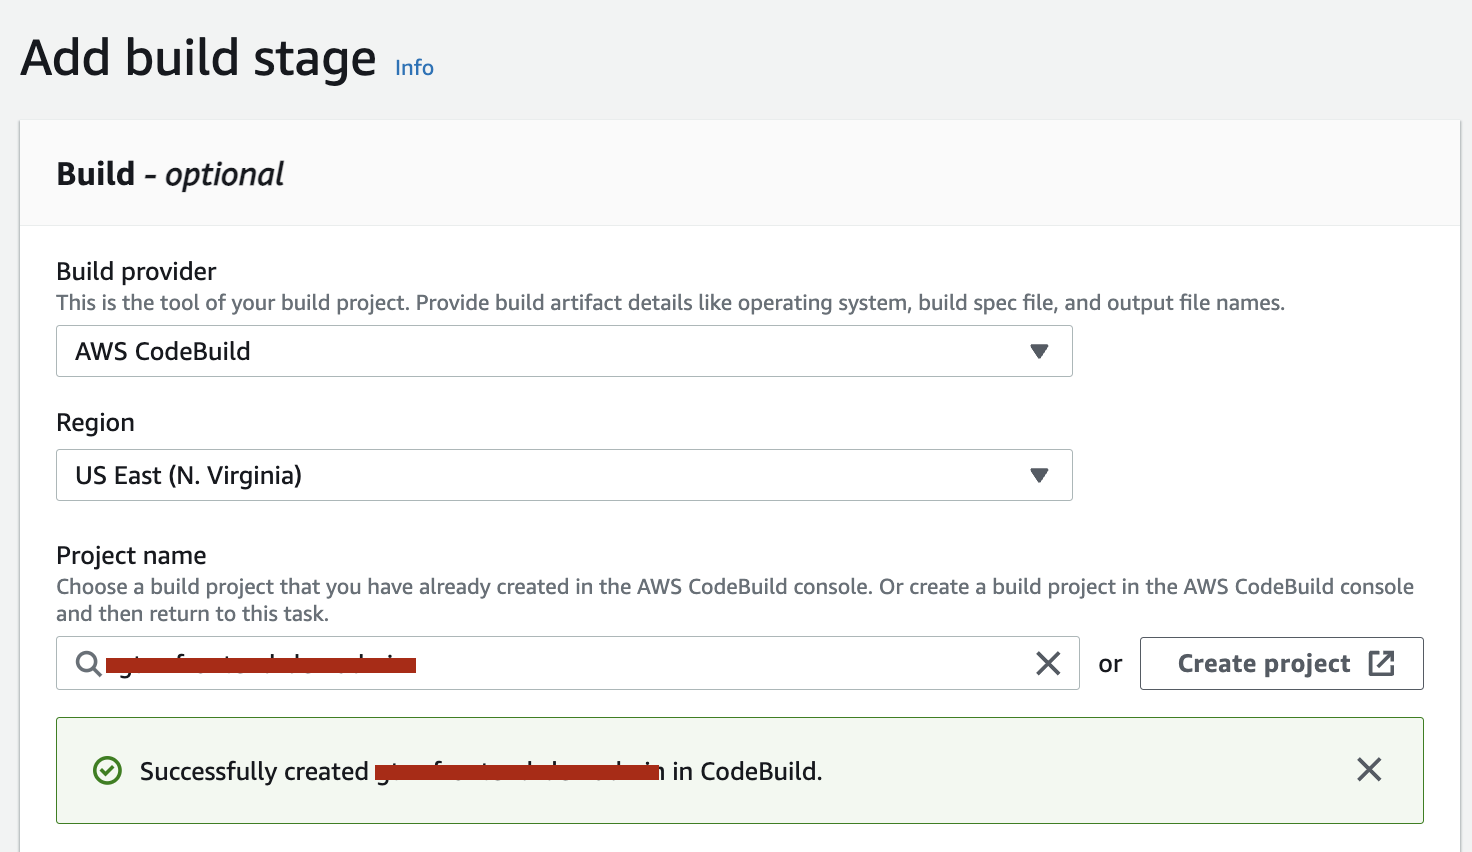
- Next, select AWS CodeBuild from the Build Provider drop-down list. Select the desired region. And click Create Project. We also set global variables and later we will return to continue building the Code Pipeline
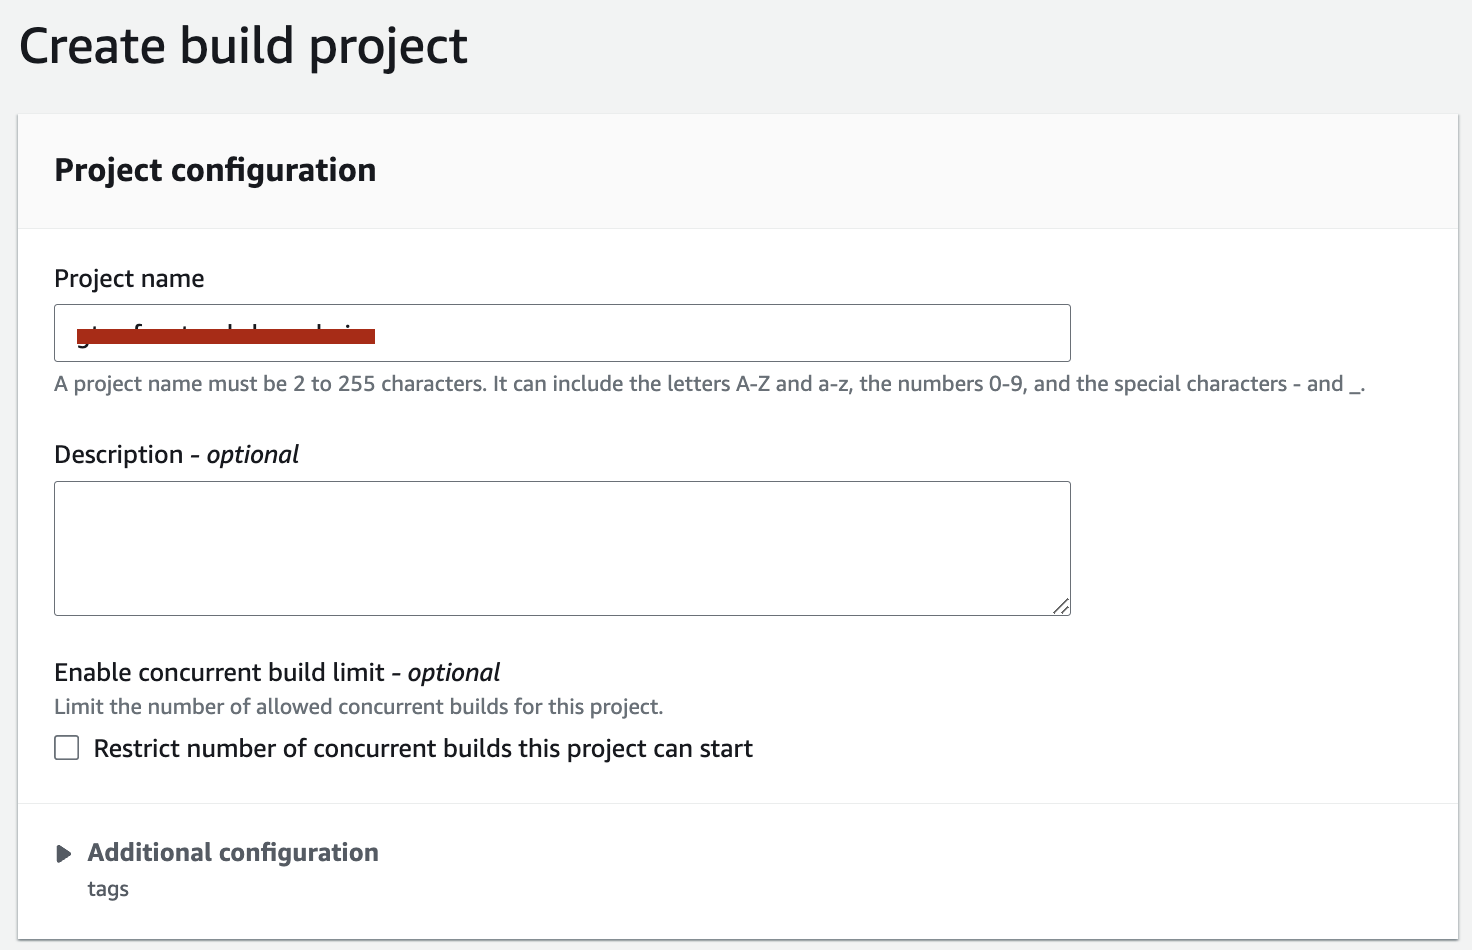
Creating a Build Project.
- After clicking Create Project, the Build Project configuration interface opens and enter Project Name
- Next, select Linux 2. And the parameters are as in the screenshot below. Be sure to select the standard:4.0 version since the standard:5.0 build version will not run for our environment and build.
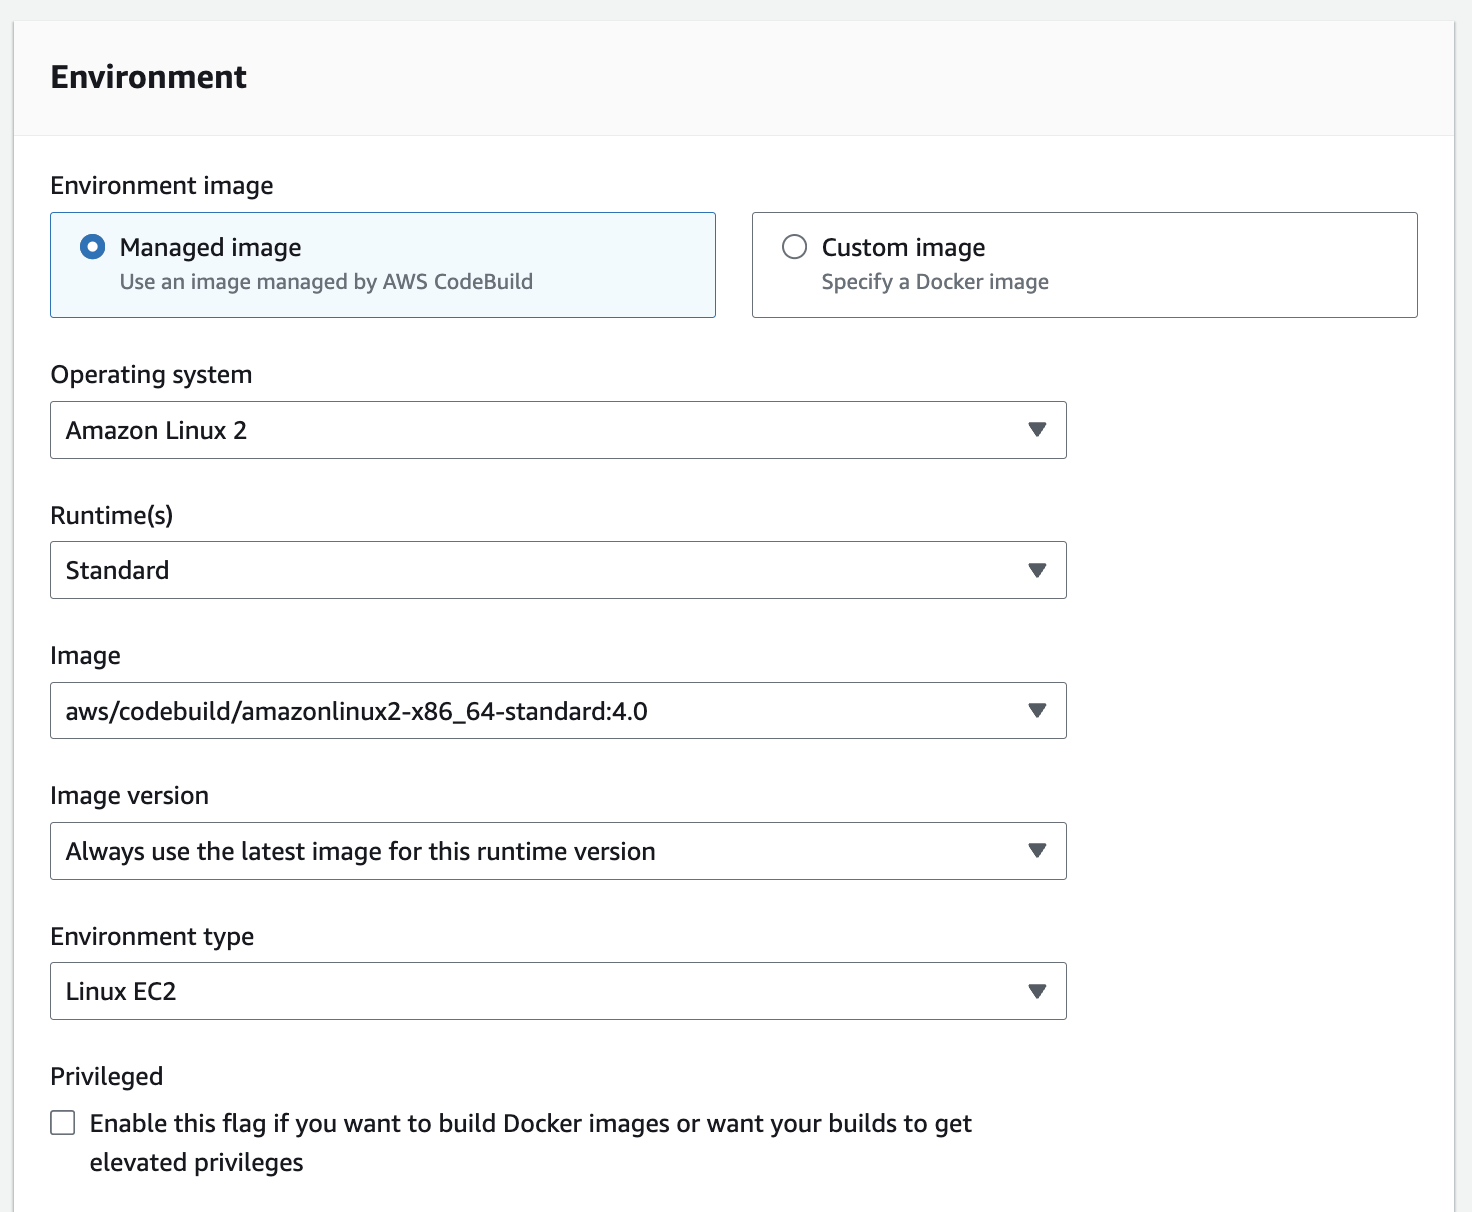
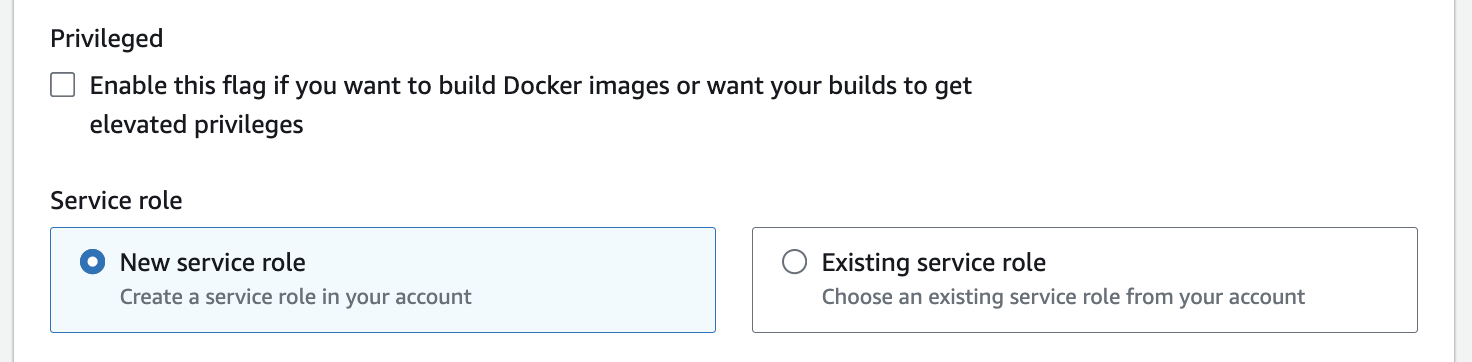
- Leave the options as default
- We increase the configuration of the temporary build environment to 7 GB of memory and 4 CPU
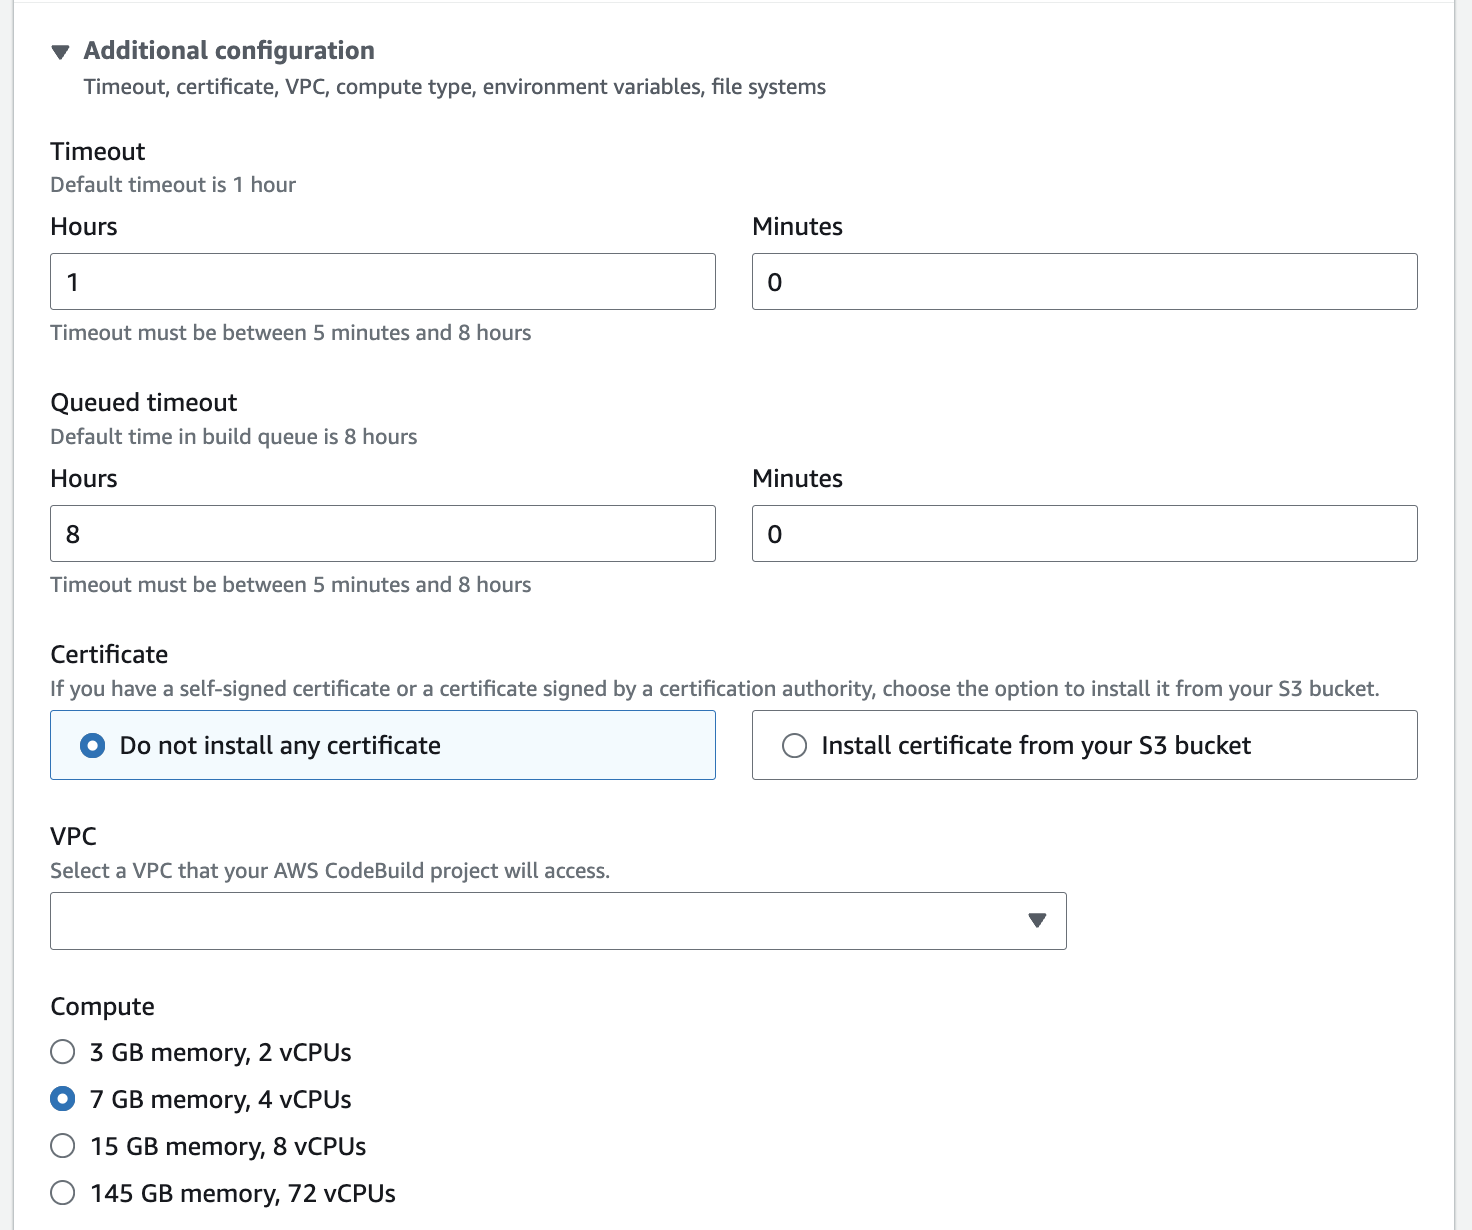
- Next, leave the selected parameters as default and click Next.
- The codeBuild stage is complete. Let’s return to further configuration of Pipeline
Creating codePipeline part 2/2
- After successfully creating a Build Project, the name of the created configuration will be highlighted in the name field and click the Next button
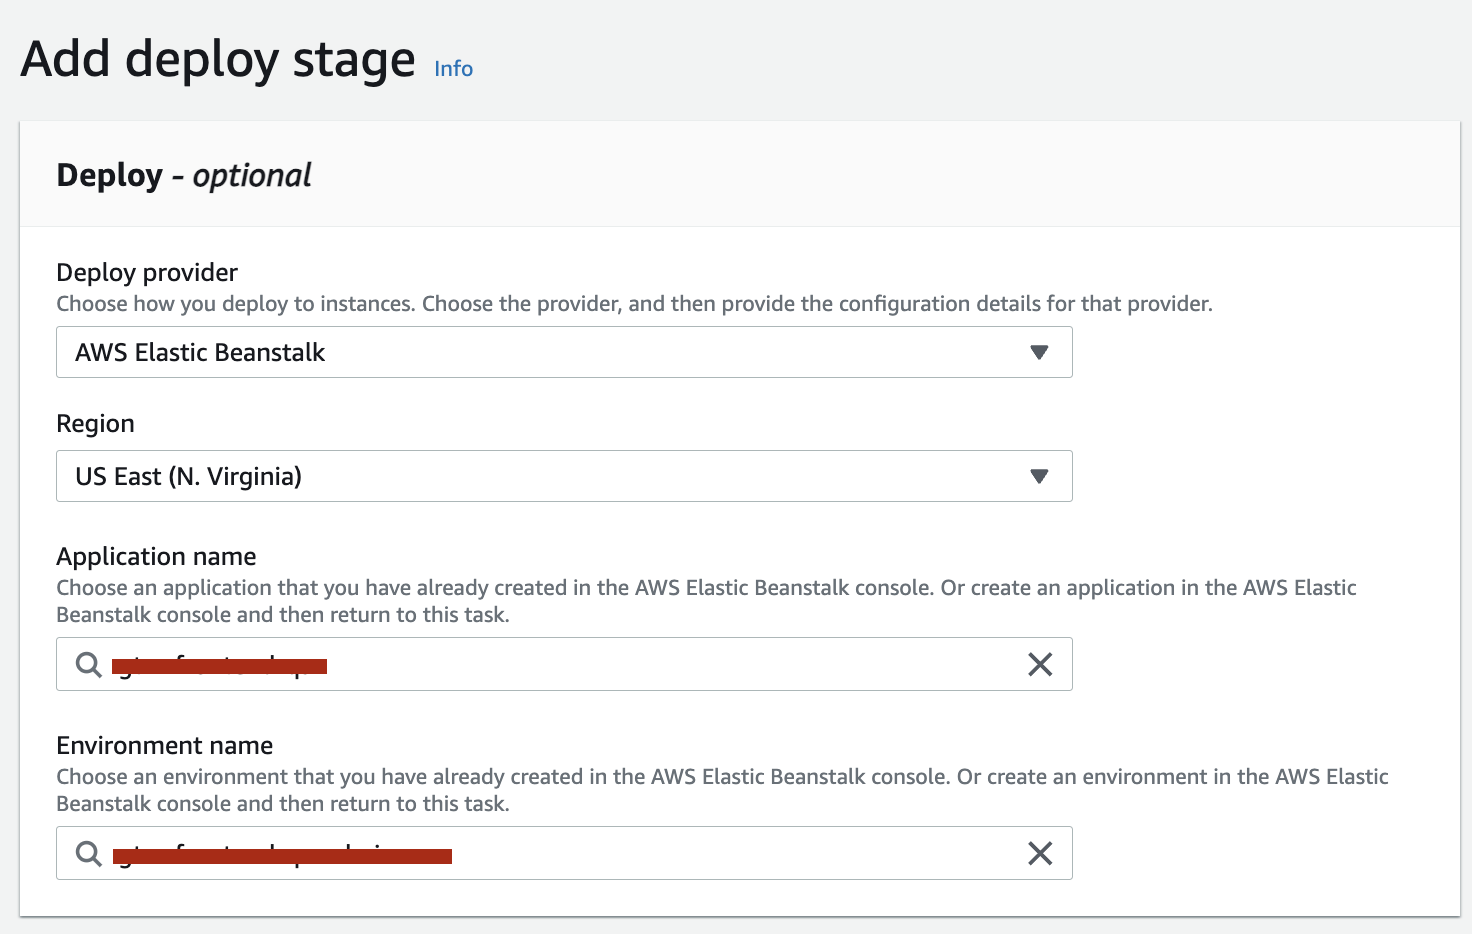
- Next, select the Elastic Beanstalk option from the Deploy Provider drop-down list. Next, from the list, select Application name, the name of our environment that we created at the Beanstalk configuration stage. Next, select the name of the created application and click Next.
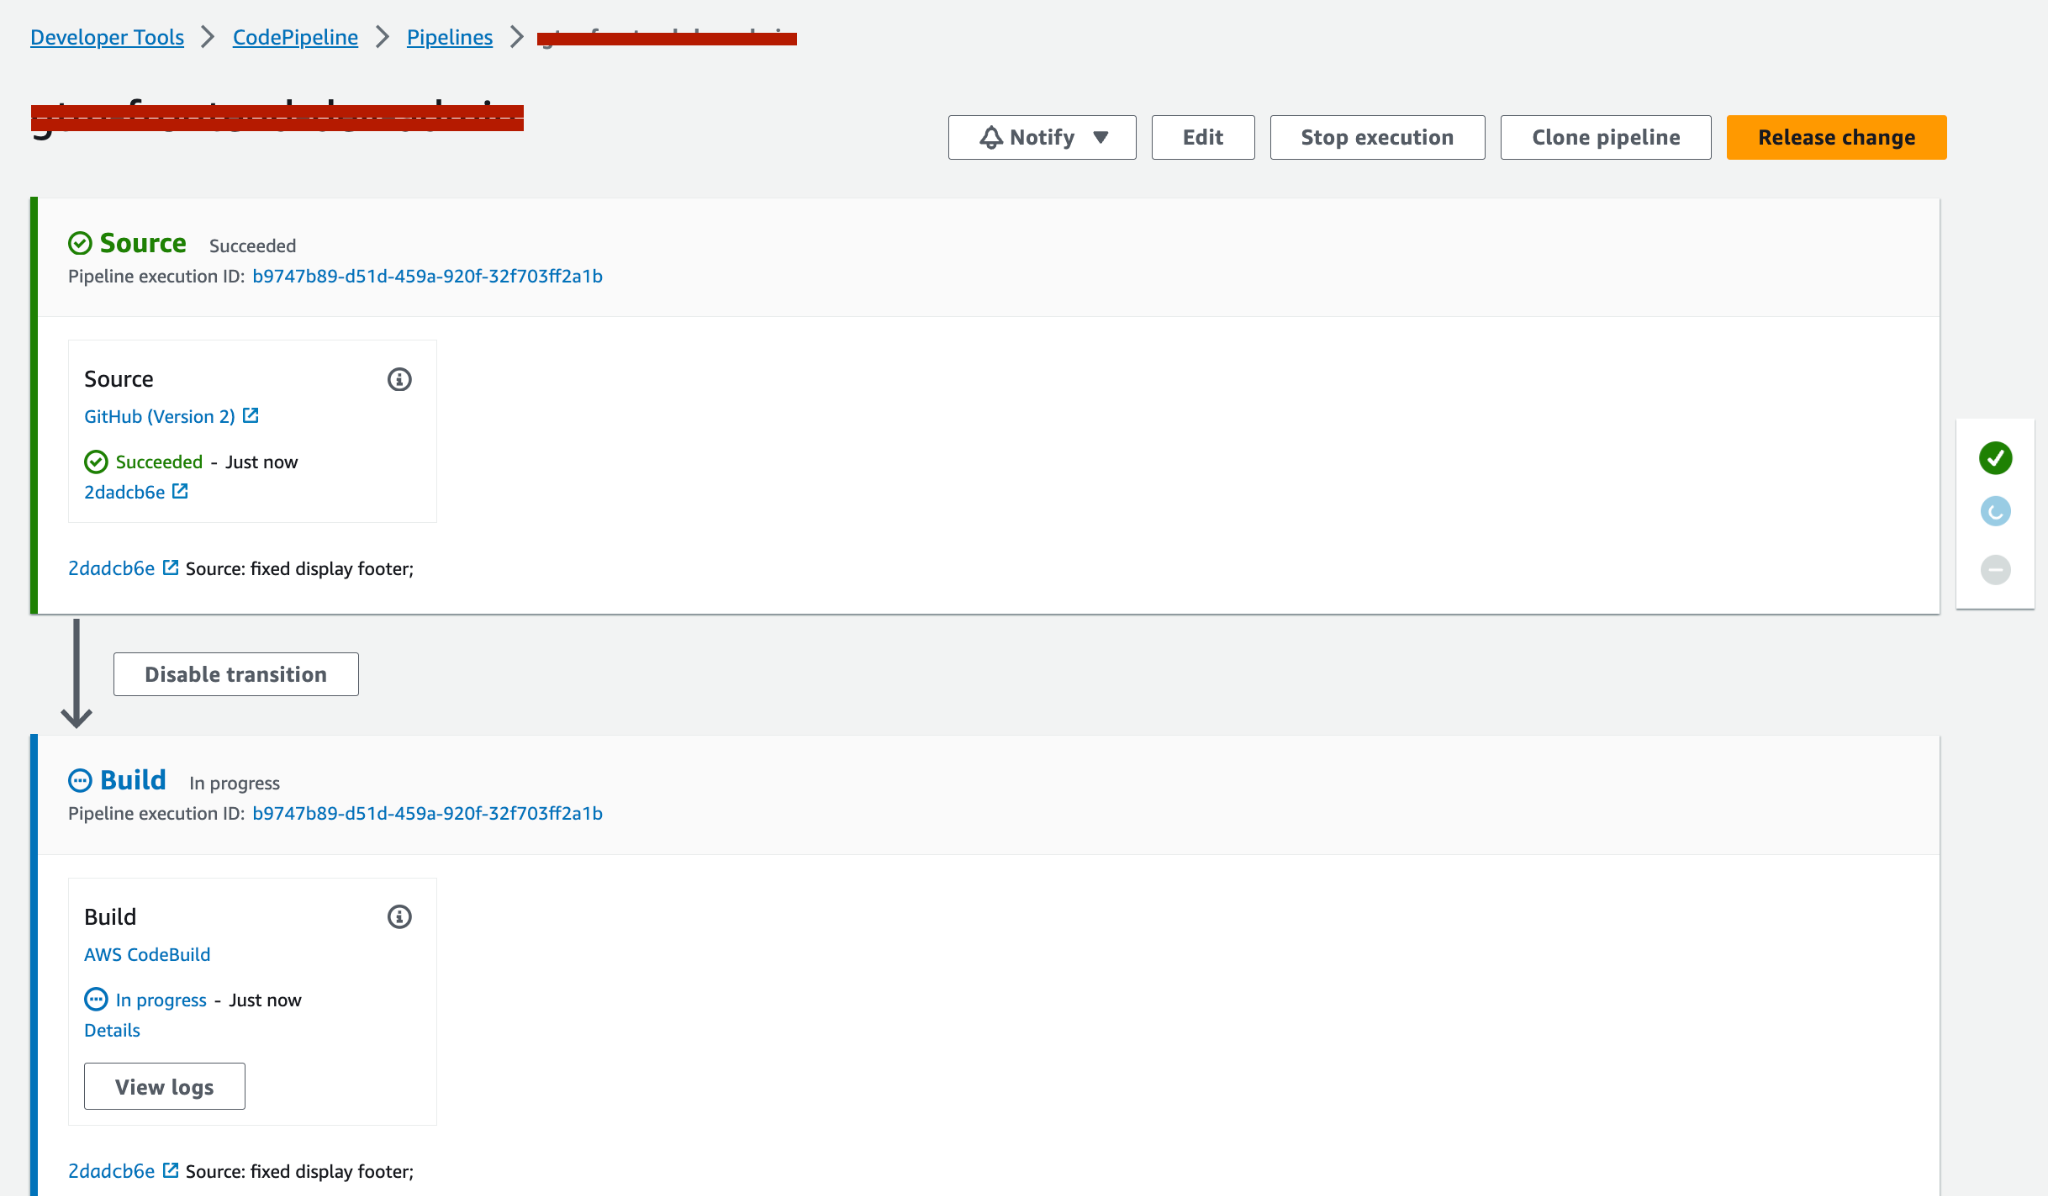
- At this point, the codePipeline setup is complete
- Now we can observe the running assembly of our application
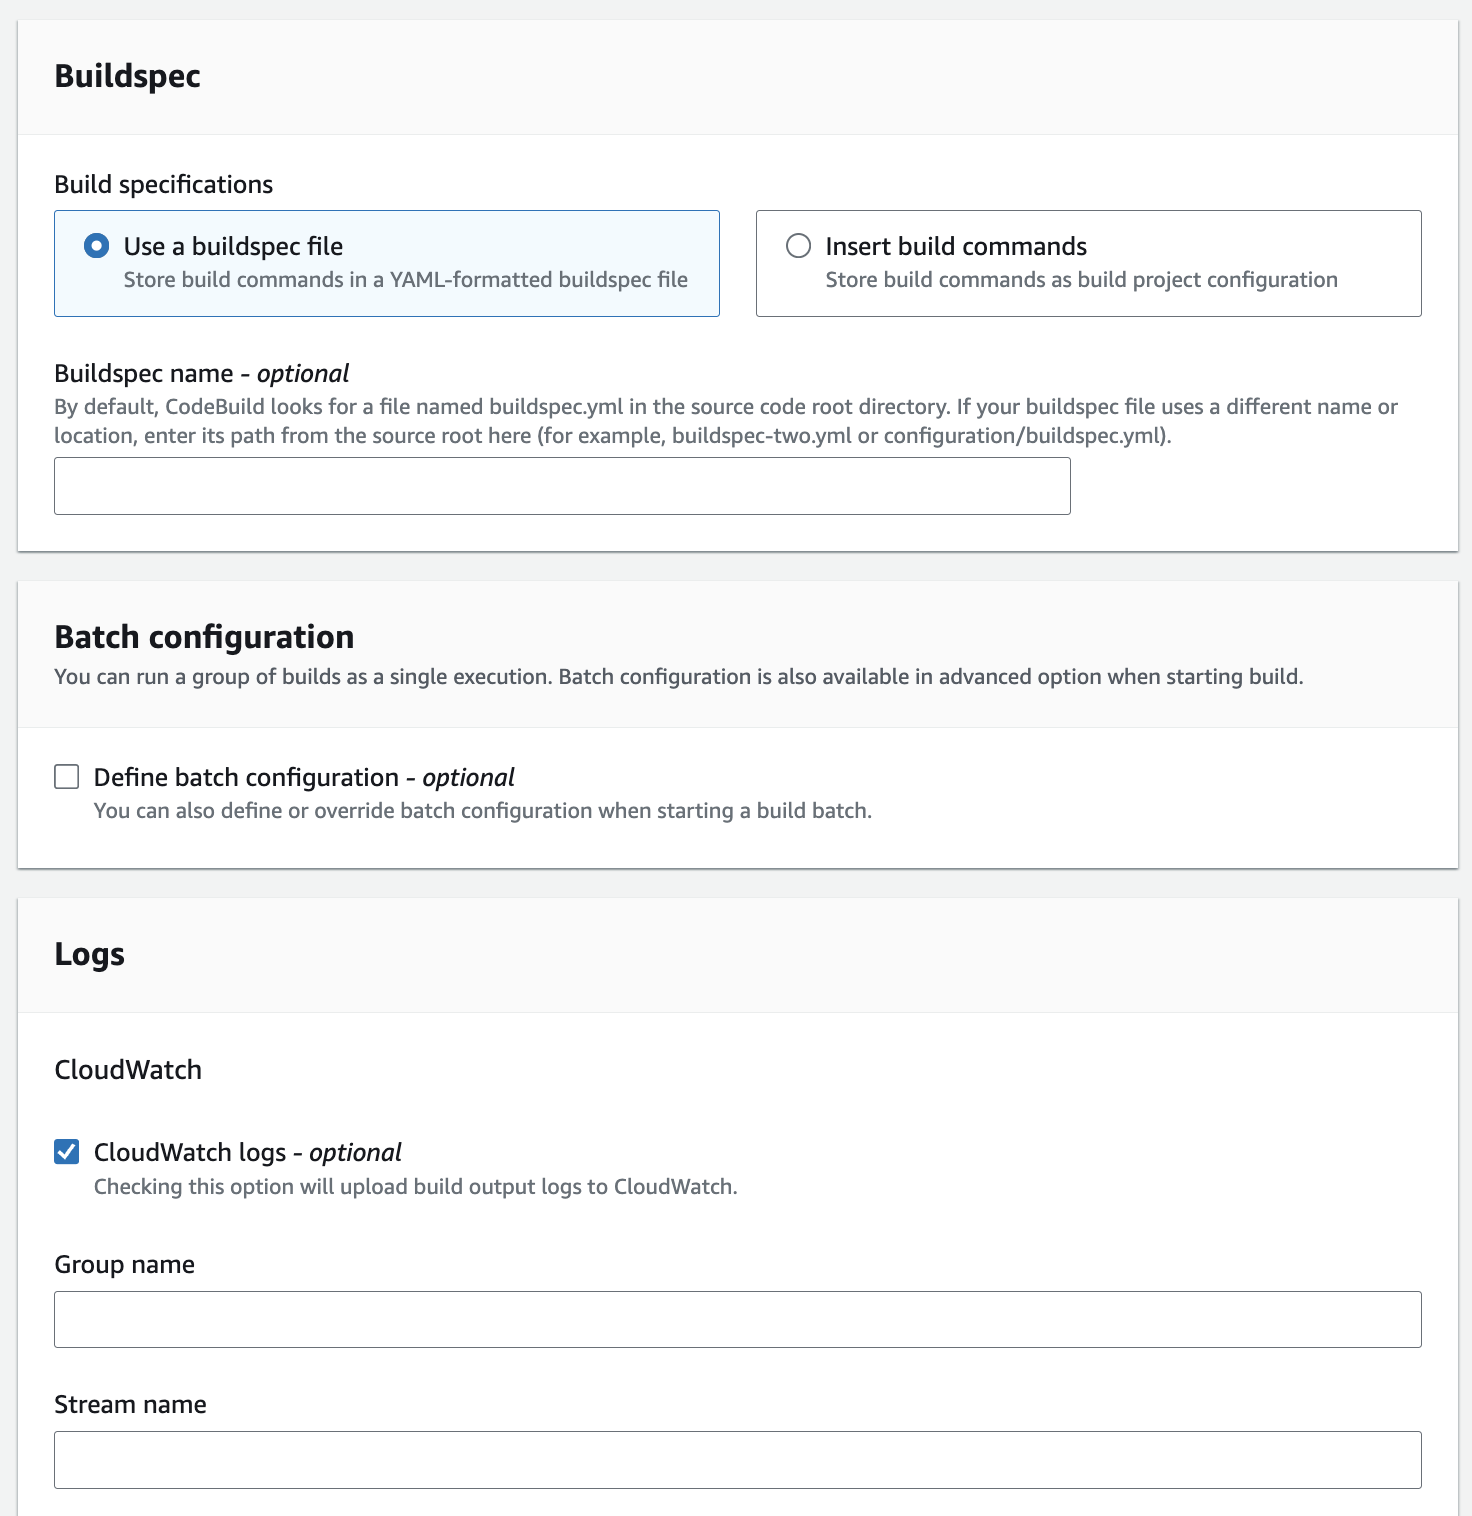
- But to successfully build the application, you need to add the build configuration configuration (buildspec.yml) for the pipeline and the deploy configuration for beanstalk (installation of yarn and other packages to successfully launch the next.js application)
Configuration files for pipeline (Buildspec.yml & cli.sh)
- We create a buildspec.yml file in the root of our project. At the build stage
- We create global variables
- Call the command from cli.sh – deploy_app
- We remove node_modules and .next/cache in order to facilitate the deployment stage on instace beanstalka, since there are memory limits of ~500mb
version: 0.2
phases:
install:
runtime-versions:
nodejs: 16
commands:
– n 16.18.1
pre_build:
commands:
– echo “preBuild APP”
– rm -rf node_modules **/node_modules
– npm cache clean –force
– yarn cache clean
– yarn install –frozen-lockfile
– yarn global add next@12.0.7
build:
commands:
– NAME_VARIABLE_IN_APP=${NAME_VARIABLE_IN_PIPELINE}
– echo “Build APP”
– pwd
– ./cli.sh deploy_app
– rm -rf node_modules
– rm -rf .next/cache
artifacts:
files:
– ‘**/*’
discard-paths: no
cache:
paths:
– node_modules/**/*
- Create a cli.sh file in the root of our project
- In the deploy_app function we add the ‘set -e’ command, since during the build pipeline stage, errors that occur during our npm run build command are not processed by the pipeline and go to the next pipeline deploy stage
- This instruction does not cover setting up the cli.sh file; to do this, contact a search engine or chatGPT
deploy_app() {
set -It is
echo “START npm run build mode”
node -in
npm -in
echo ‘AMPLIFY_ENV: ‘ + $NEXT_PUBLIC_AMPLIFY_ENV
npm run build –workspace=@name_project/app
}
- The creation and preparation of files at the pipeline stage is completed
Configuration files for elastic beanstalk (.sh file & package.json)
- We create a directory .platform/hooks/prebuild/ in the root of our project with the file yarn.sh
- You can learn more about hooks and instance beanstalk configuration inofficial AWS documentation
- First, we install node.js of the required version (_16.x is the required syntax for downloading the version) since node.js is not yet available at the prebuild stage.
- Next we install yarn and initialize it for global access
- Next, using yarn, we install next.js of the required version
- And if you are using the env-cmd package to work with global variables
- Next, we re-install all package dependencies of our project, since at the build stage in the builddpec.yml file we removed the deploy pipeline stage for proper operation
#!/bin/bash
echo “install node.js”
sudo curl –silent –location https://rpm.nodesource.com/setup_16.x | sudo bash –
sudo yum -y install nodejs
sudo wget https://dl.yarnpkg.com/rpm/yarn.repo -O /etc/yum.repos.d/yarn.repo
sudo yum -y install yarn
export PATH=”$PATH:$HOME/.yarn/bin”
source ~/.bashrc
cd /var/app/staging/
sudo yarn global add next@12.0.7
sudo yarn global add env-cmd
sudo chown -R webapp:webapp node_modules/ || true
sudo yarn install –frozen-lockfile
- I assume that you already have a package.json file in the root directory because it should be your default when working with next.js. It must contain the npm start command
“scripts”: {
“start”: “npm run start –workspace=@name-project/app”
}
- Now we push all the changes to the github repository and the pipeline assembly should start again
Conclusion
- We return to codePipeline. We are waiting for the completion of the build stage. If the build was not successful, you can view the logs by clicking on the View logs button at the build stage and scroll to the end.
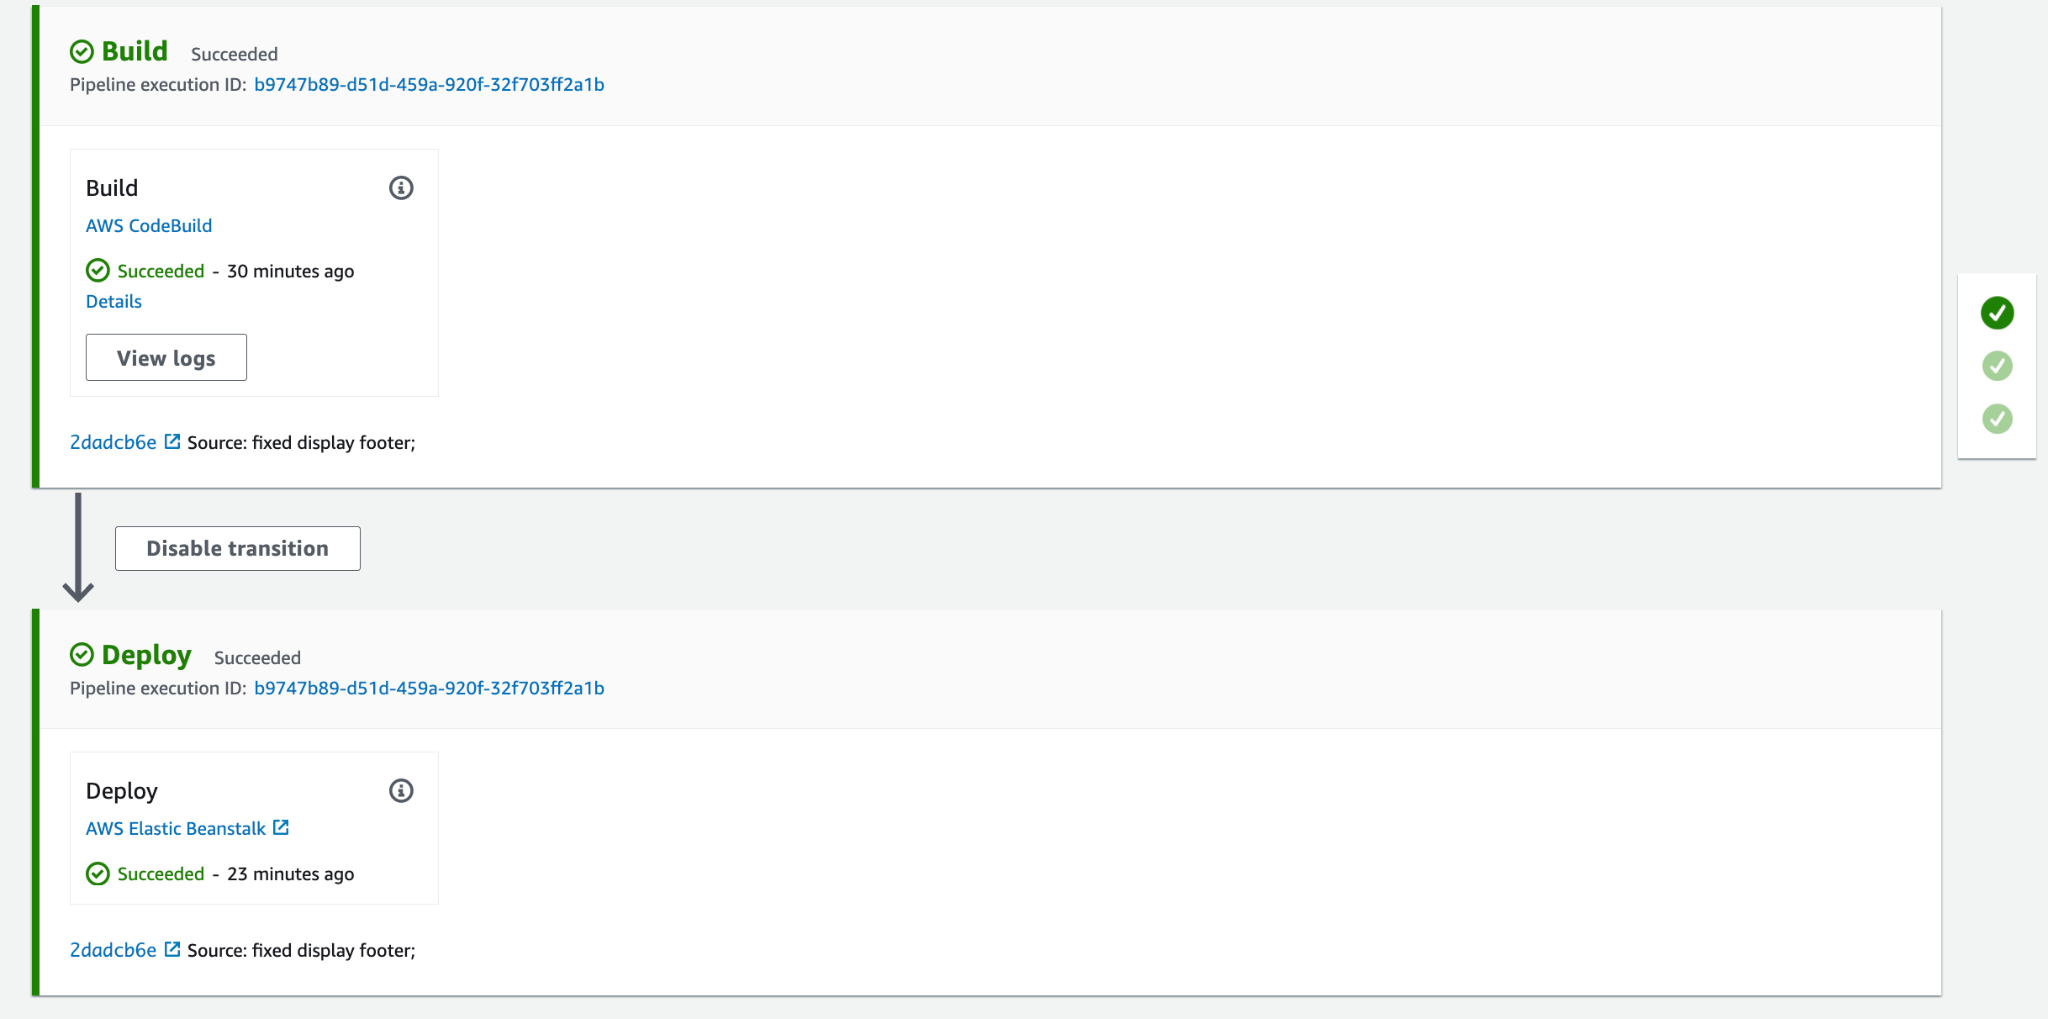
- If the build stage was successful, then we have completed 80% of our journey successfully.
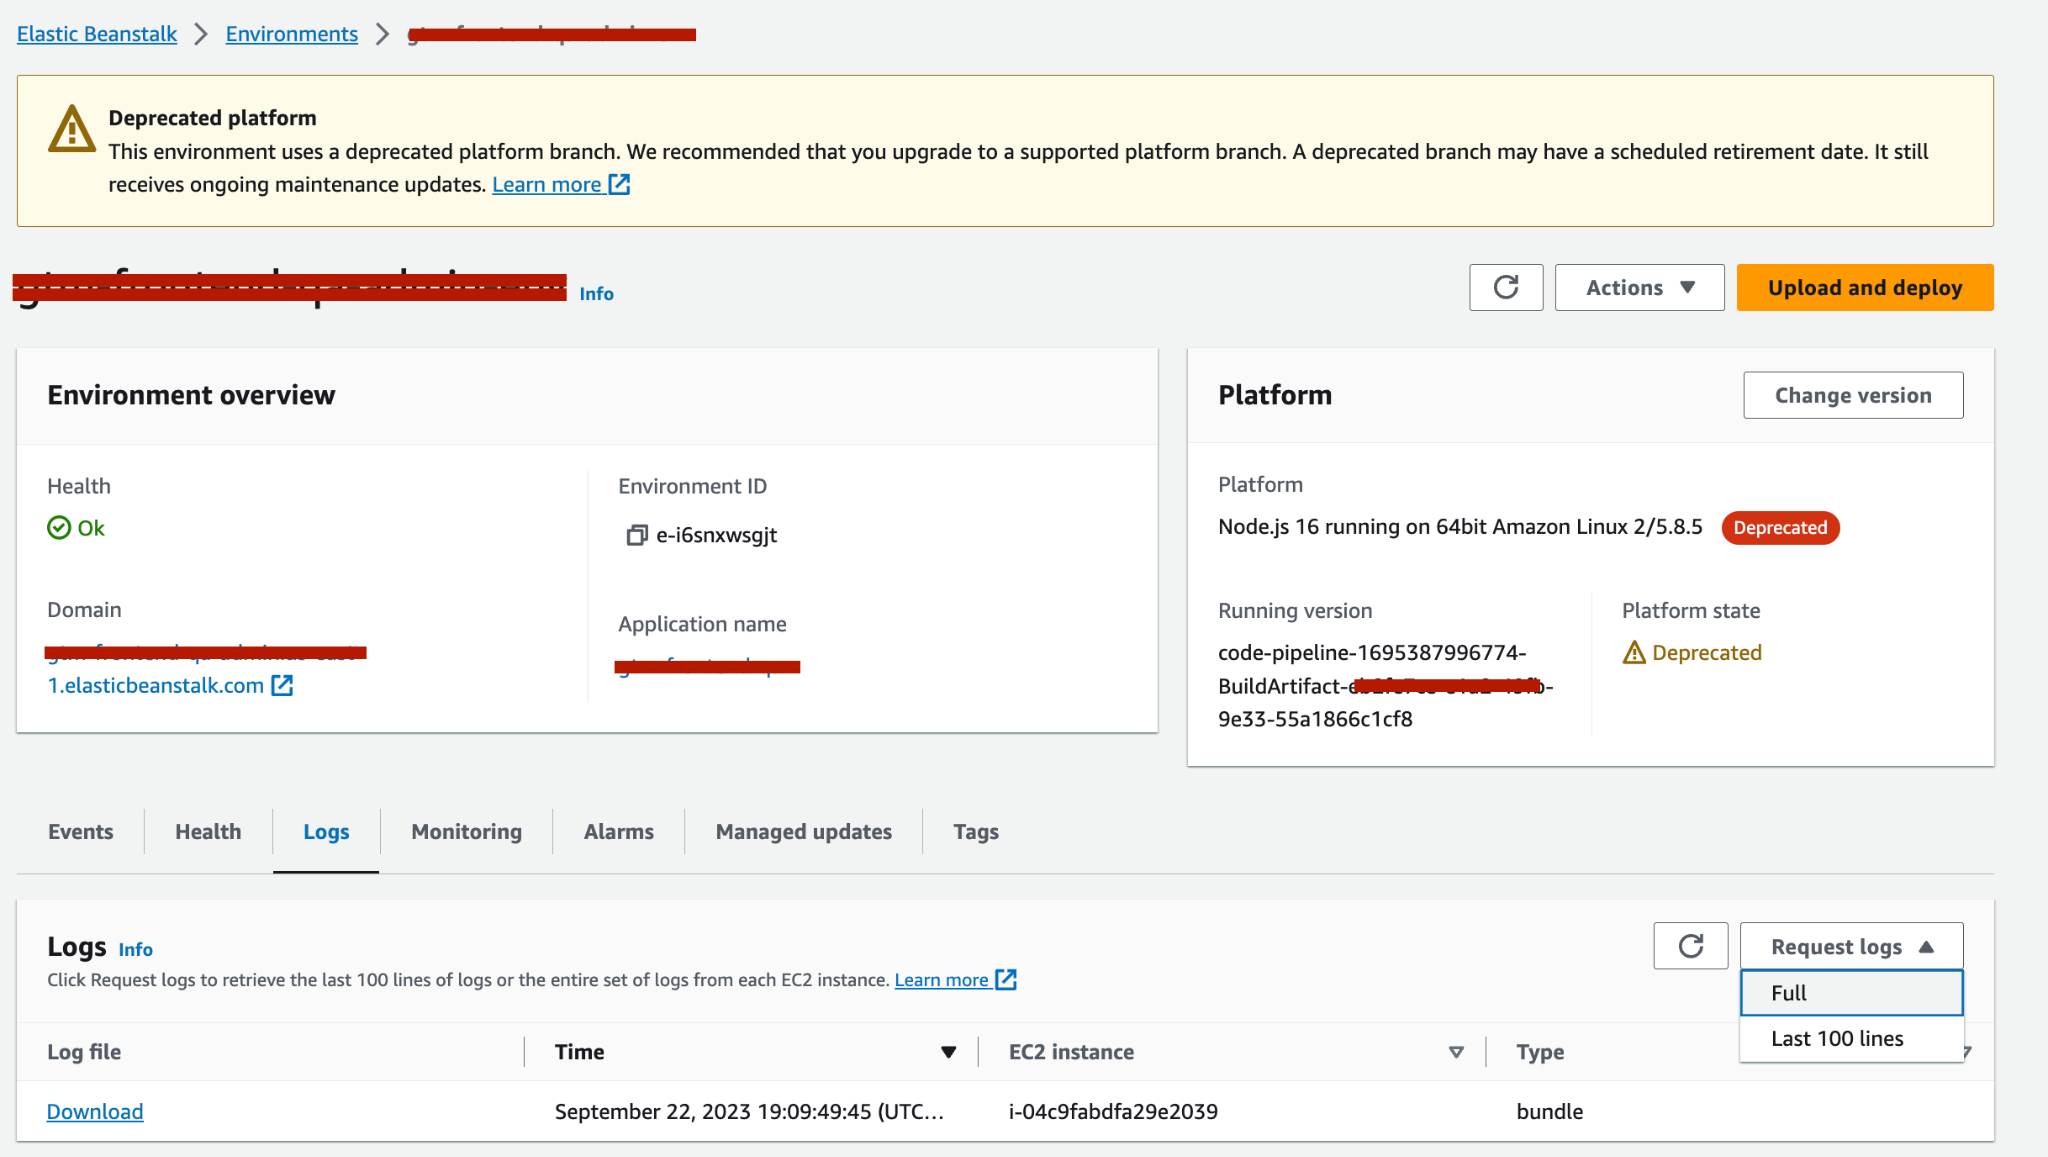
- If the deploy step fails with an error, you can get the deployed information in Beanstalk by opening your application environment and opening the Logs tab at the bottom (as in the screenshot below) and selecting Full from the drop-down list. And then download by clicking on the Download button. There are a lot of useful command line files and beanstalk hooks there. If this information is not enough, then we can go to the instance itself and try to run the project ourselves and check whether it will work on the temporary beanstalk domain. We discussed the step of how to log into ec2 instance in this instruction
- If the deploy was successful, then we return to our environment elastic beanstalk
- And click the link to our temporary domain
- The application will open. If this does not happen, check the logs, the port on which the application is launched and try to go to your ec2 instance and run your assembly on port 8080 yourself.
How can you make the application available via https?
- We purchase domain, if you don’t have it yet, for this use the AWS documentation (Route53)
- It will help you get a certificateAWS Certificate Manager, a button to automatically add a DNS CNAME record to Route53 is also available there
- You need to register DNS records (CNAME) in Route53 and change the type A record with the alias option selected on Beanstalk
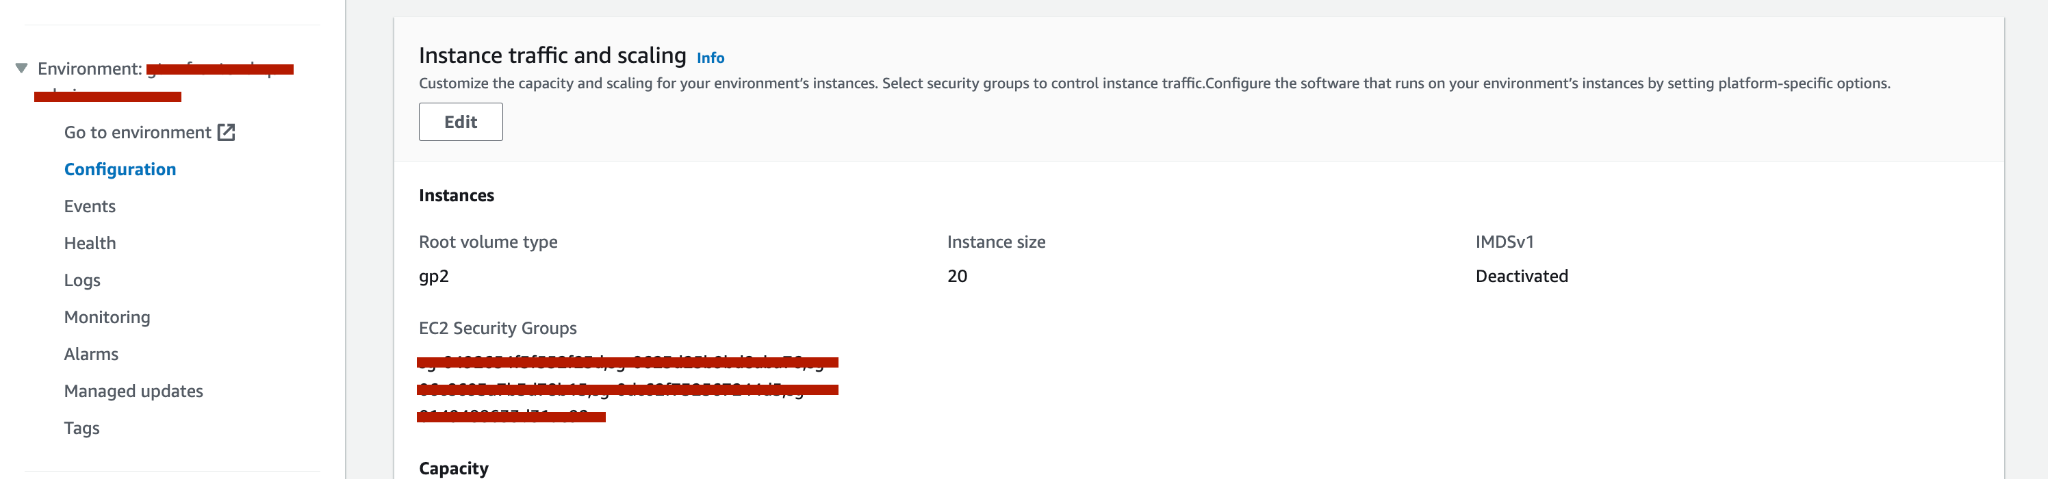
- And after that we return to Beanstalk. Open the Configuration tab. Find the Instance traffic and scaling section. Click on the Edit button
- Find the Listeners section
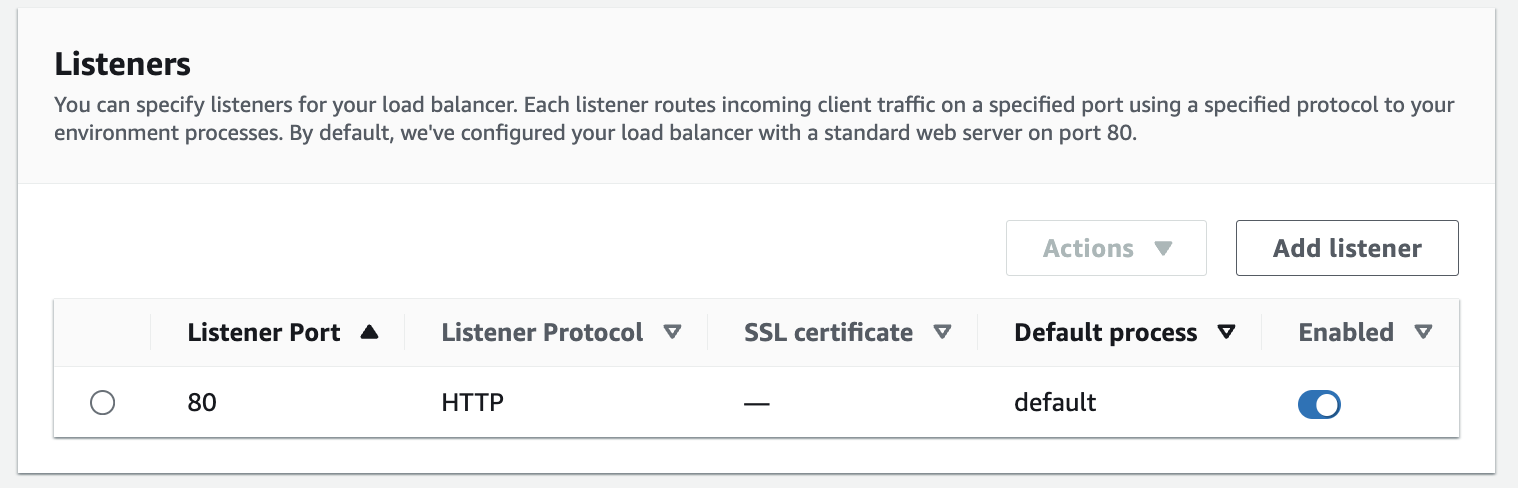
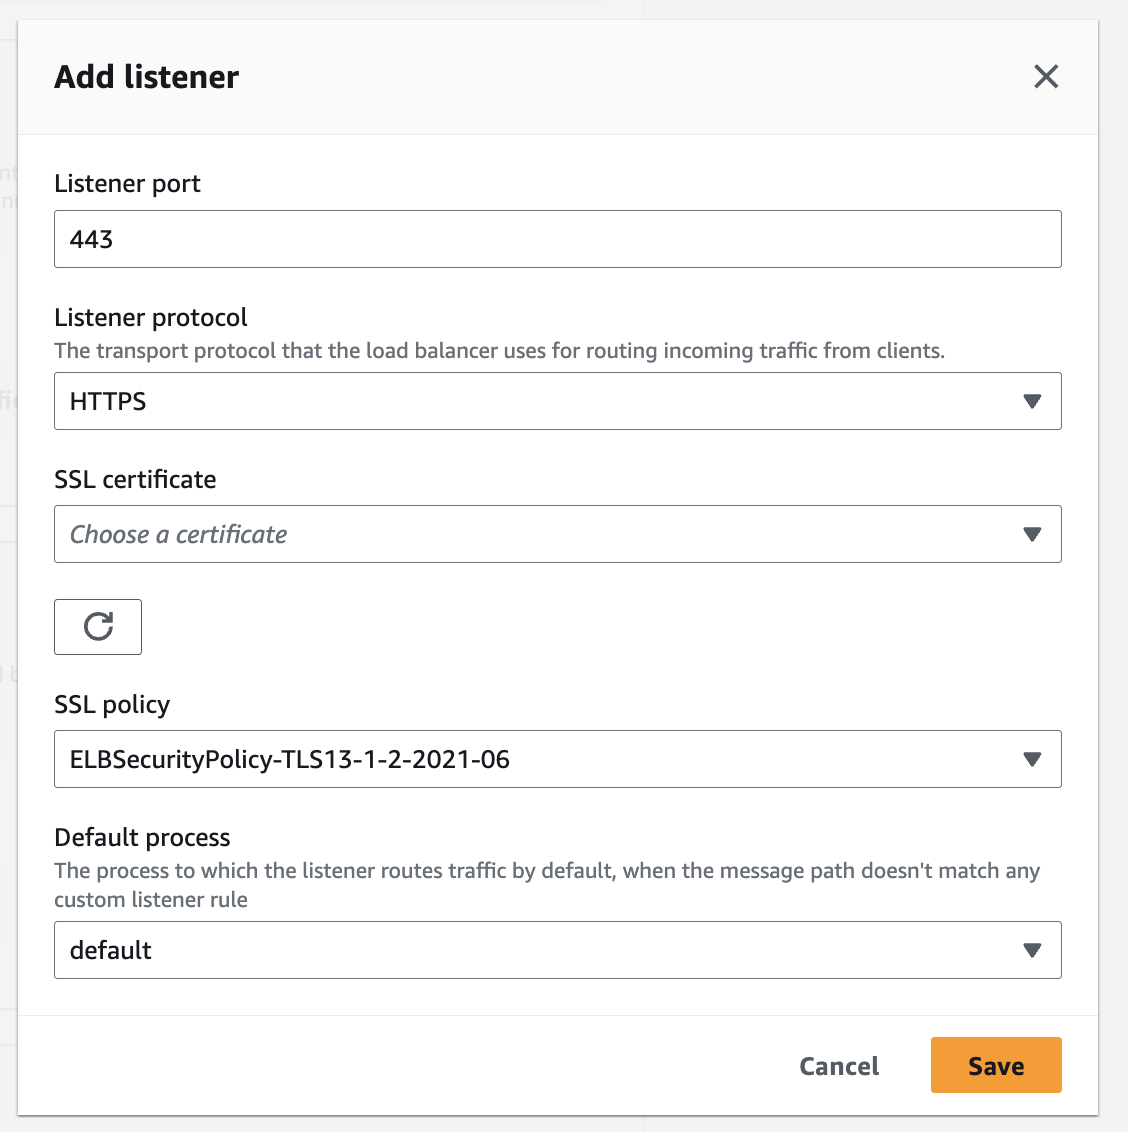
- Click the Add listener button
- Enter port 443, select https, the SSL certificate created in step 2 and select the latest SSL policy. After that, save, scroll down and accept the changes.
- Congratulations, you have a working next.js project running on aws beanstalk + pipeline on https